
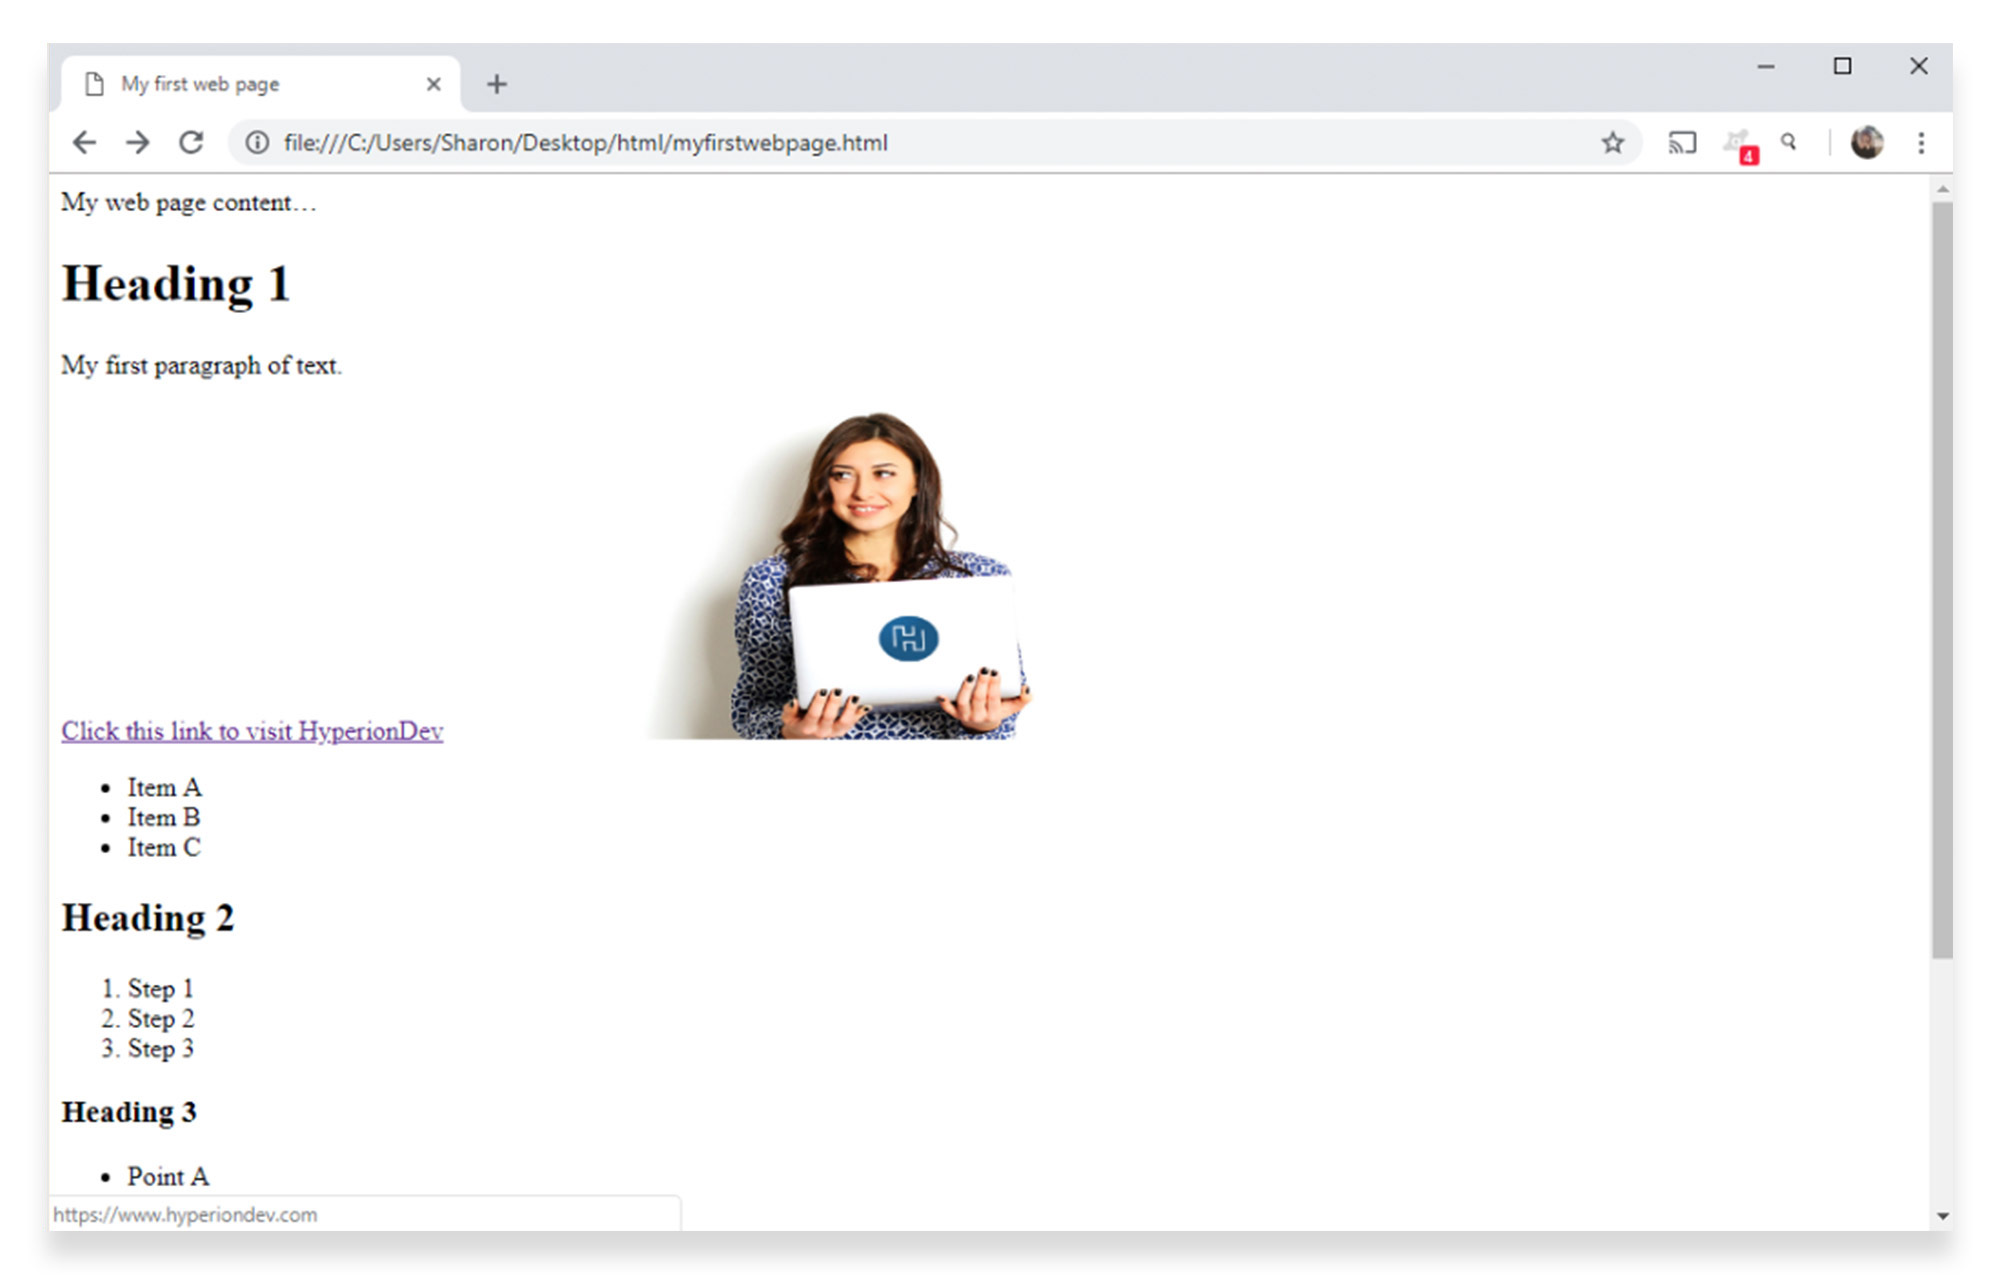
If you’ve been following our HTML tutorial series, you’ll be familiar with how to create a basic HTML page with titles, headings and paragraphs. You’ll also have a basic understanding of Lists, links and images. By the end of our second tutorial, your document in Notepad++ should be displaying as follows:
In this next tutorial, you’ll be adding to the code to set up tables and forms in HTML.
HTML tables
Tables can be a useful way of organising content on a web page, particularly text.
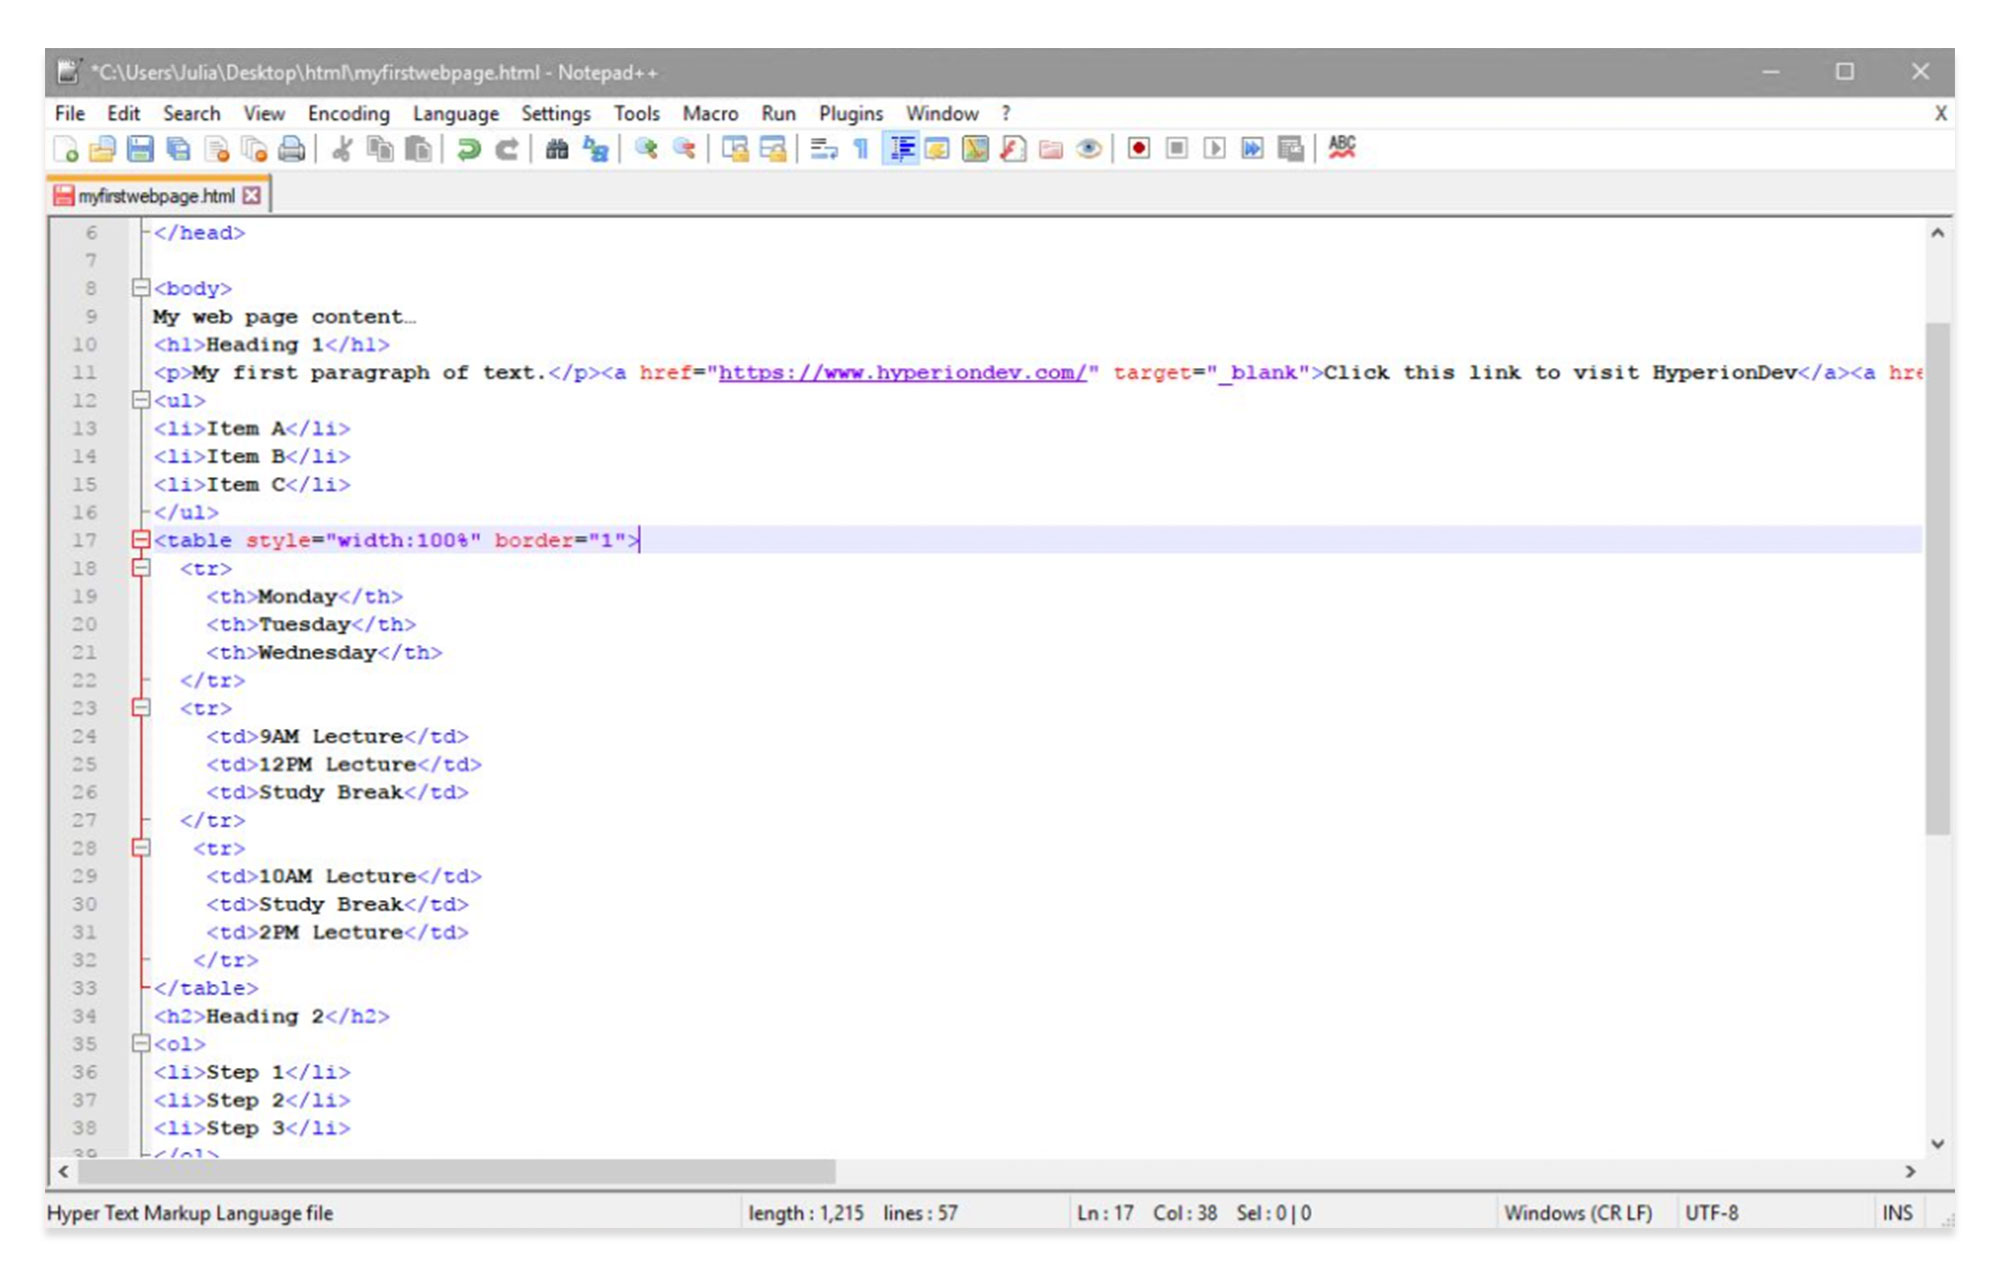
- A table is defined with the <table> tag.
- Each row in the table is defined with the <tr> tag.
- A table heading is defined with the <th> tag. (Headings are bold and centred by default.)
- Each cell of data in the table is defined with the <td> tag.
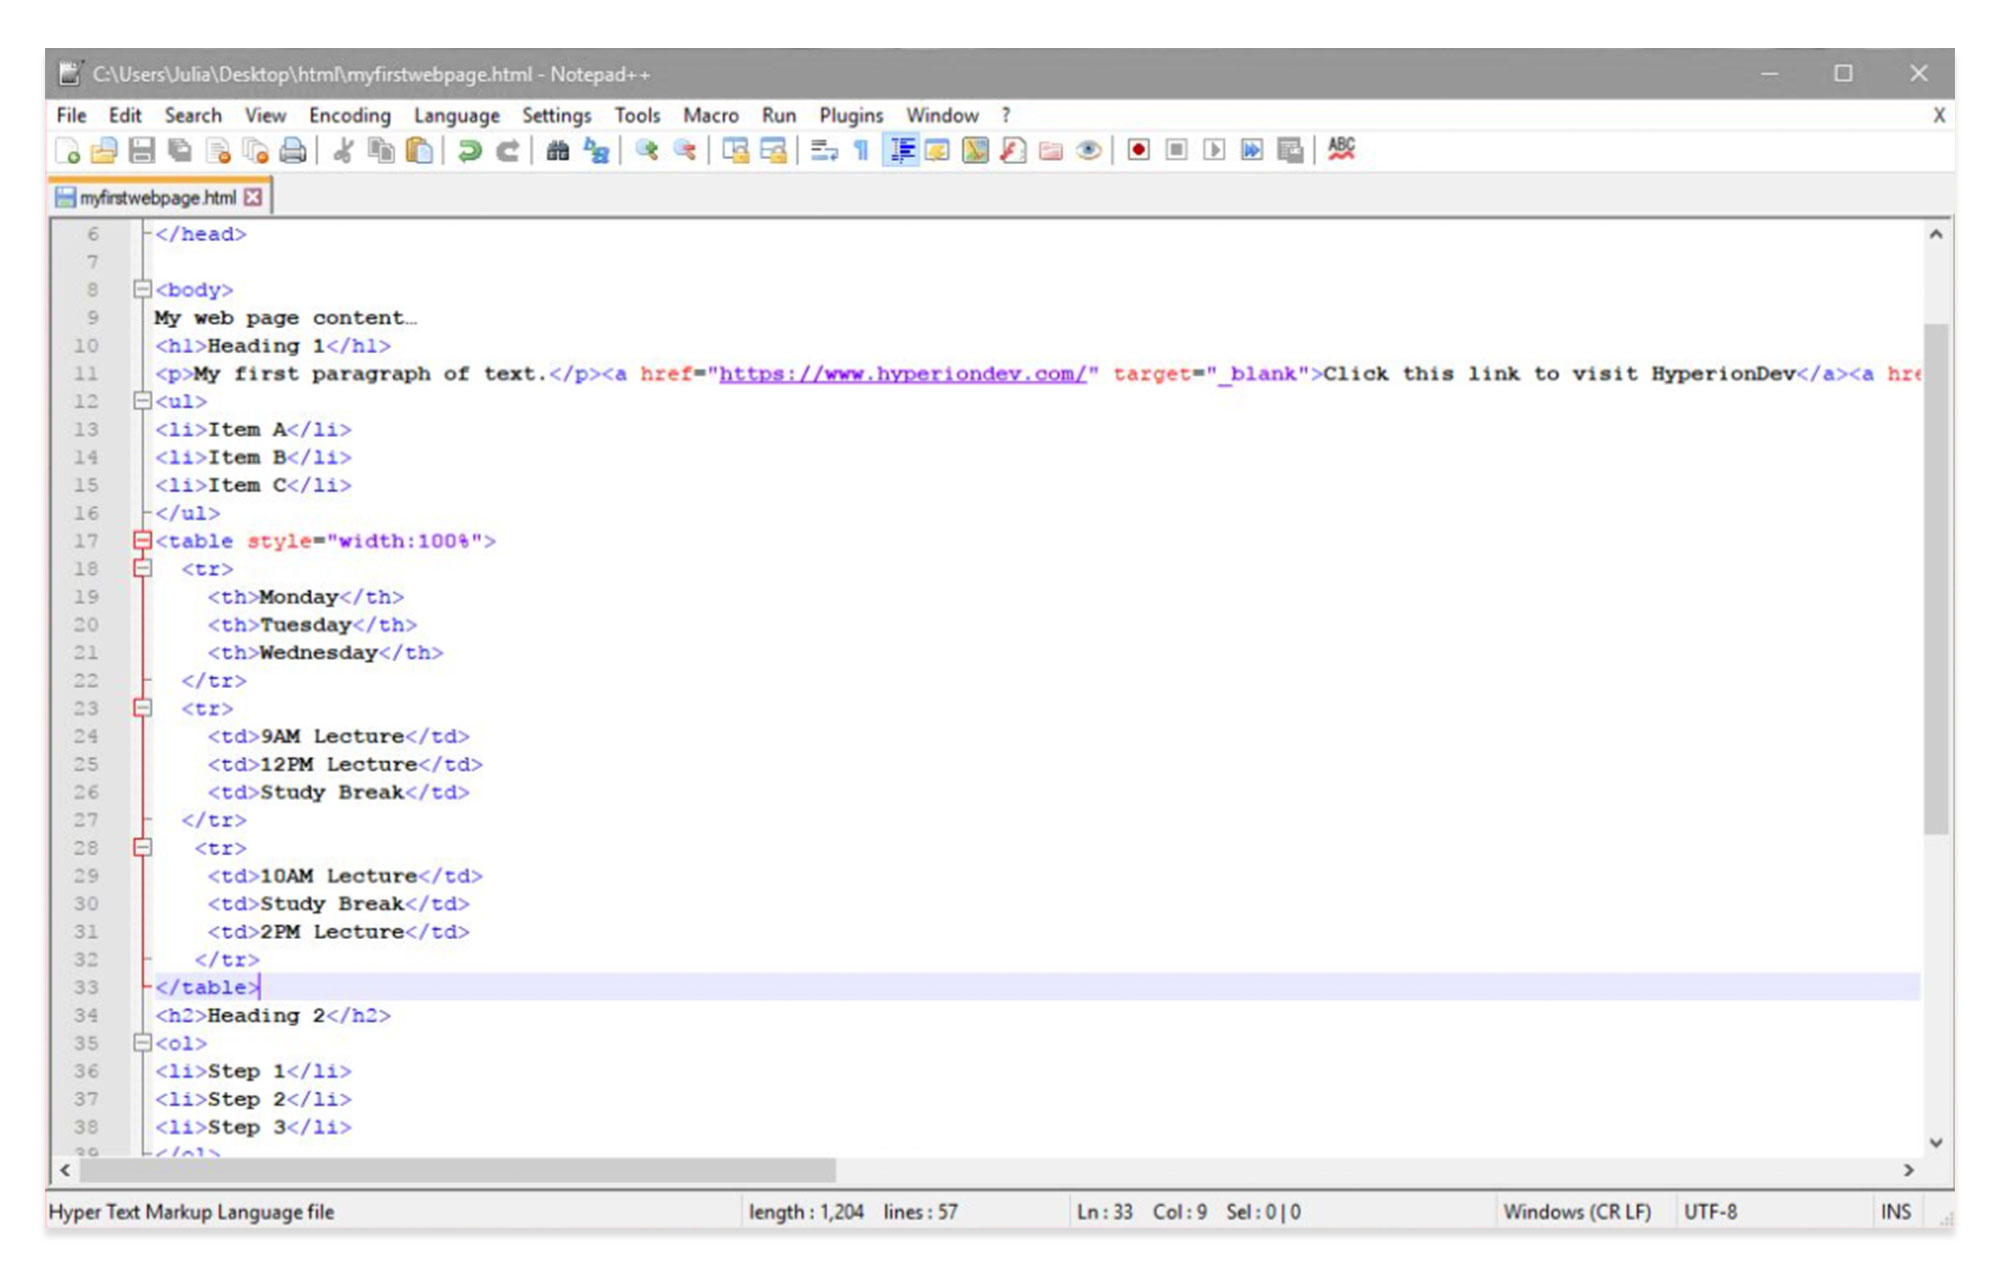
Basic table: Set up a table with three headings to your page, by adding the following code to your document under the “ordered list” code. This is a real-life example that lists a weekly class schedule. The <th> tags will form the columns in this table, and the <td> tags will form the rows.
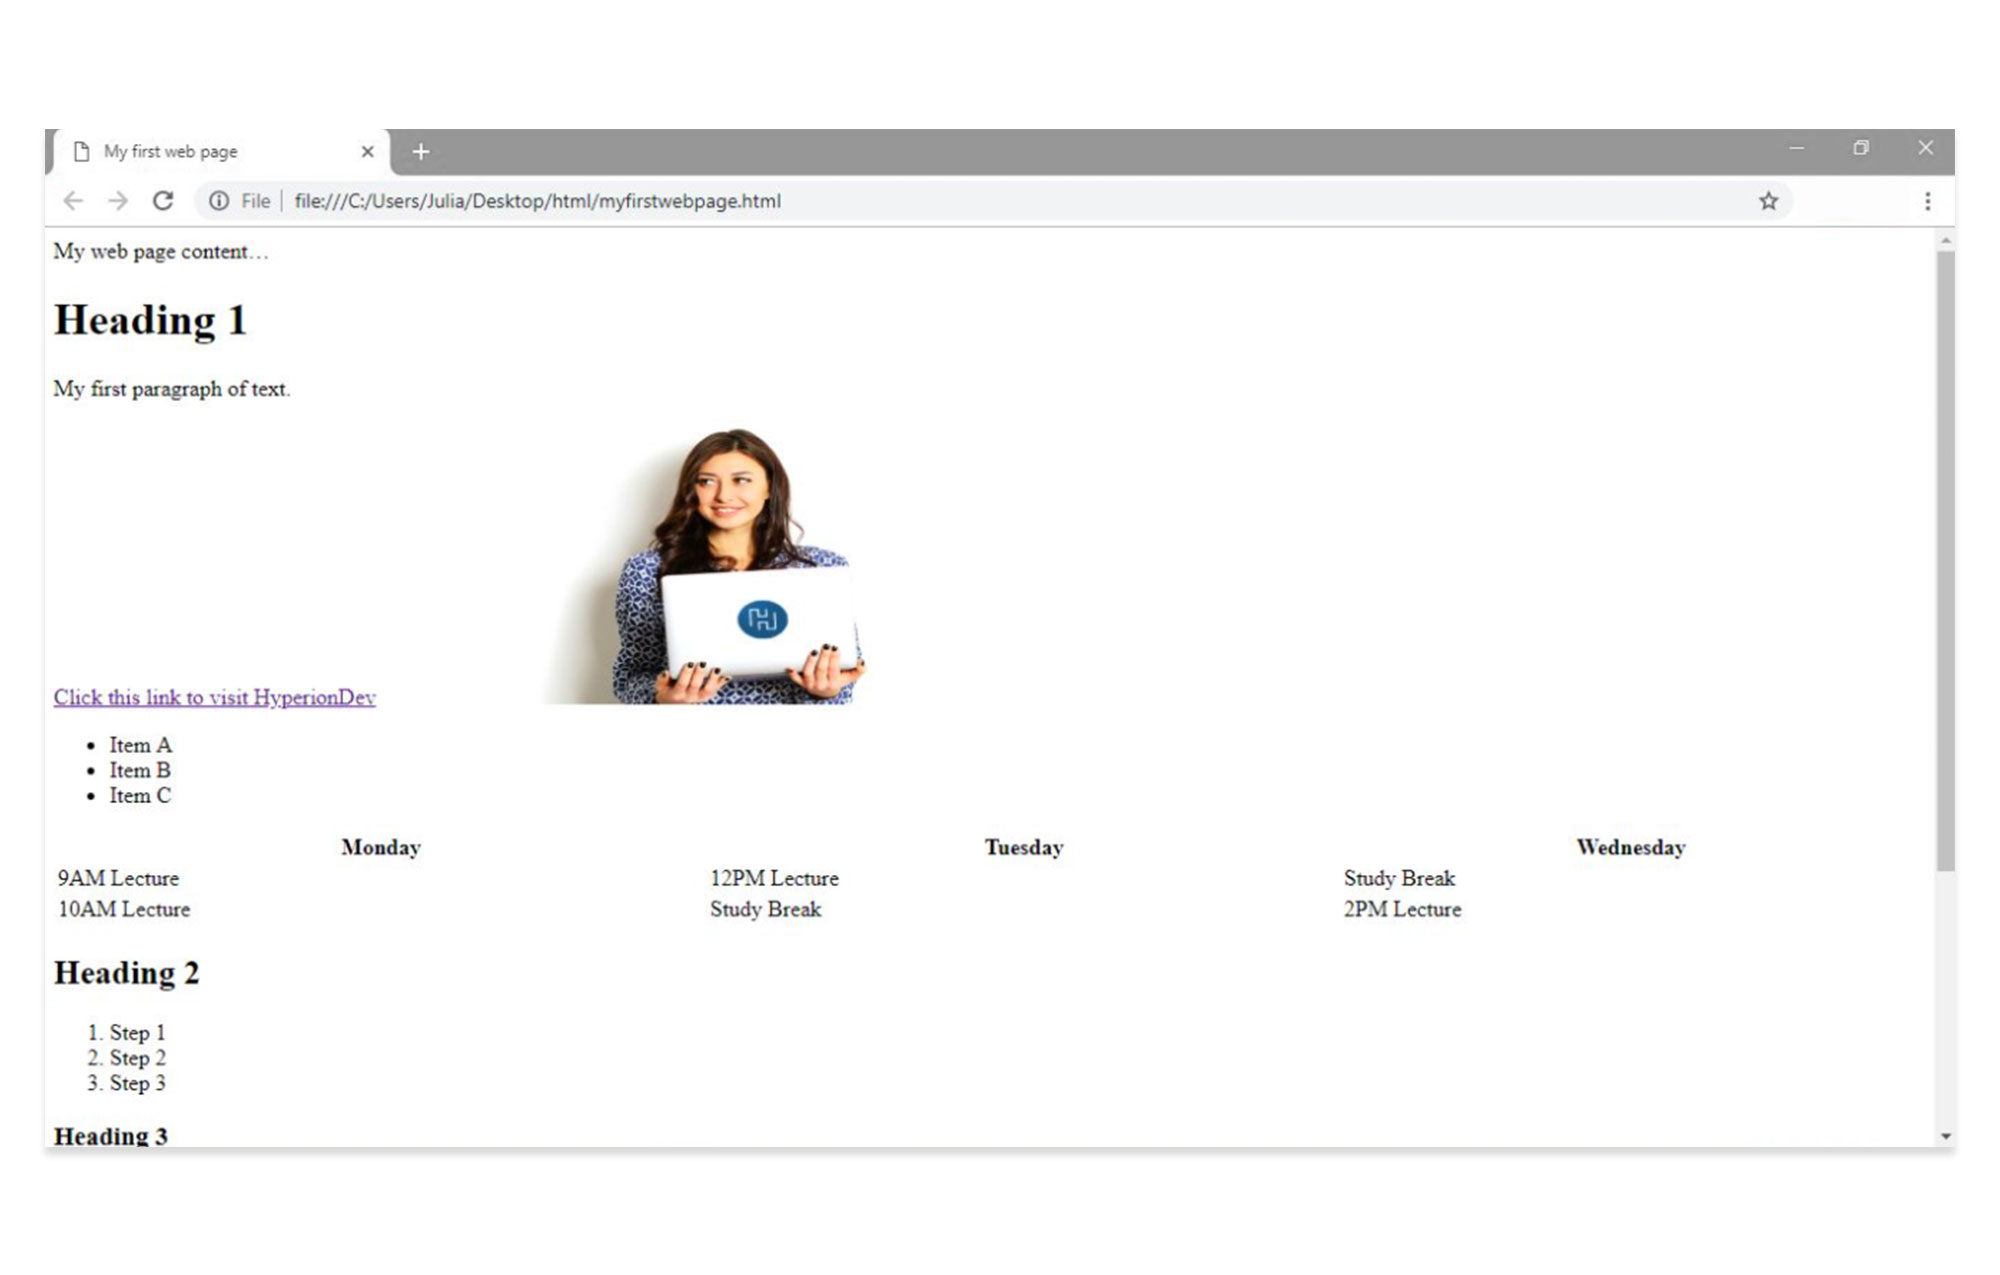
<table style="width:100%">
 <tr>
   <th>Monday</th>
   <th>Tuesday</th>
   <th>Wednesday</th>
 </tr>
 <tr>
   <td>9AM Lecture</td>
   <td>12PM Lecture</td>
   <td>Study Break</td>
 </tr>
  <tr>
   <td>10AM Lecture</td>
   <td>Study Break</td>
   <td>2PM Lecture</td>
  </tr>
</table>
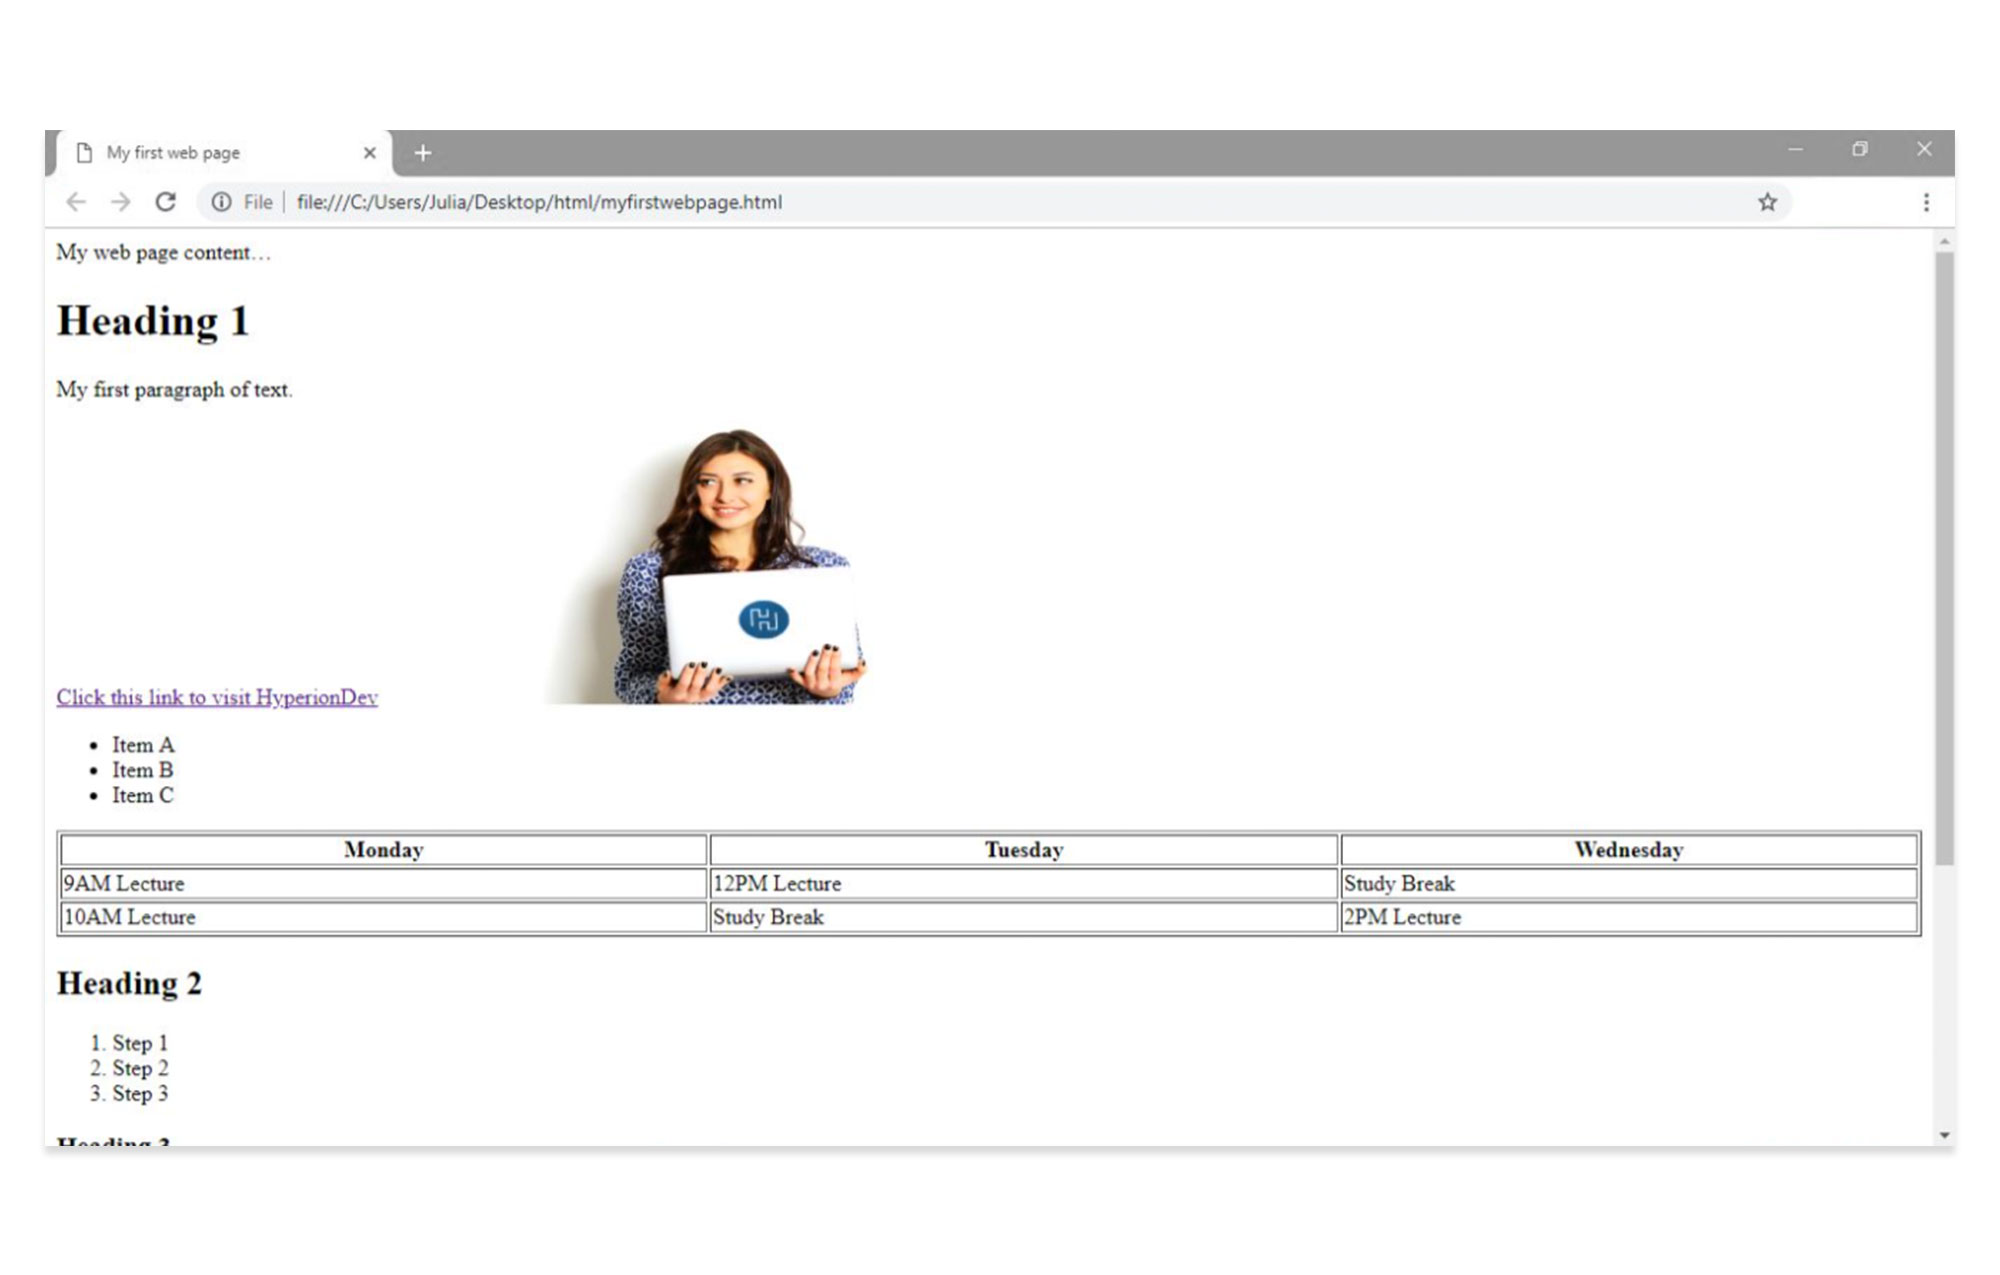
When you refresh your page, the table will appear as follows:
To add borders to your table and align the text, you would need to use CSS properties.
To make our example more visually clear, we’ve added the CSS border property: border=”1″ to our table. You’ll be able to learn more about CSS properties and how to use them in future tutorials.
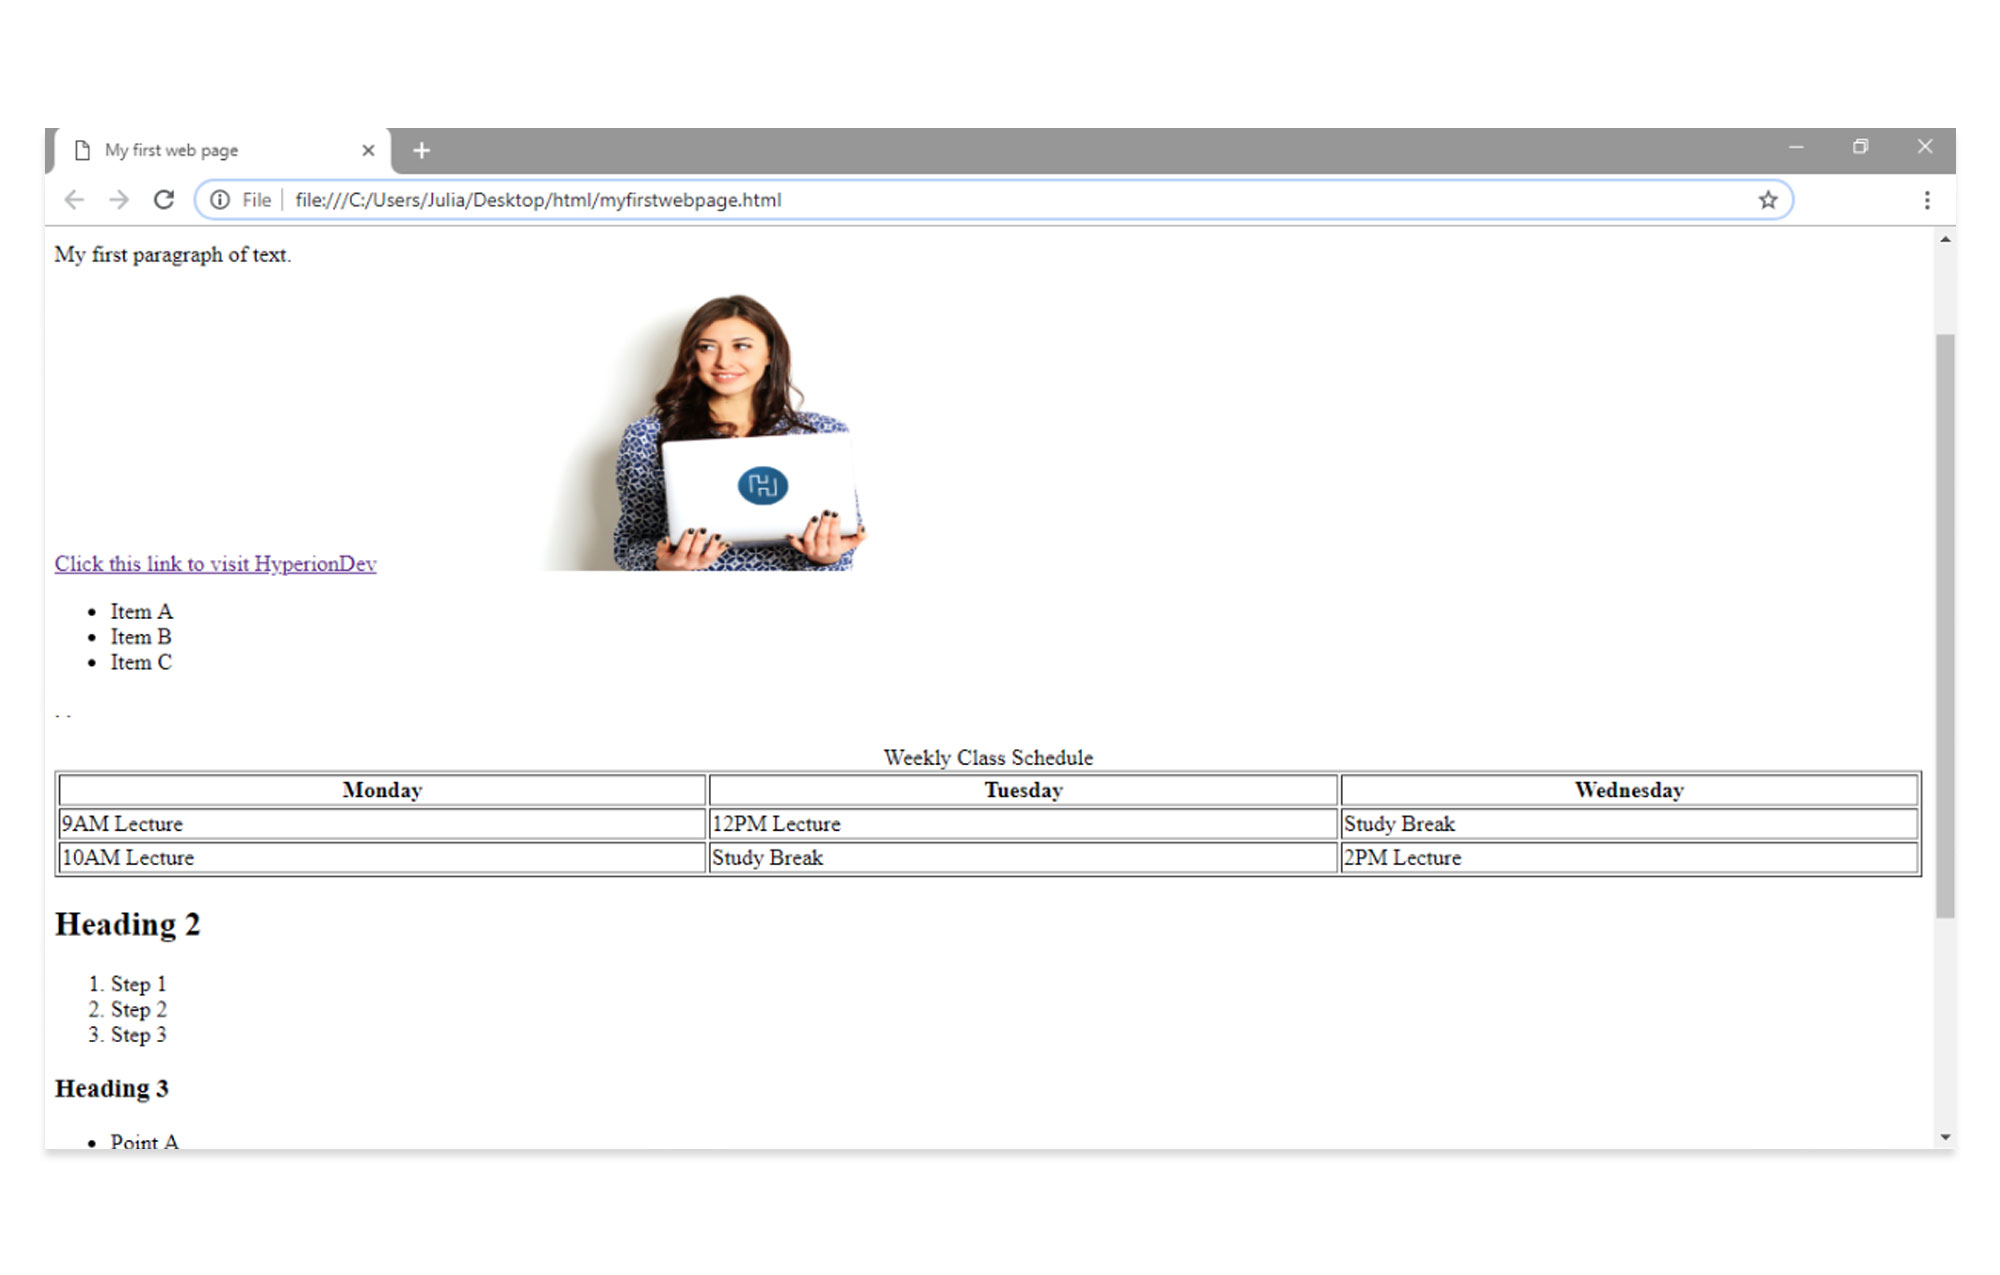
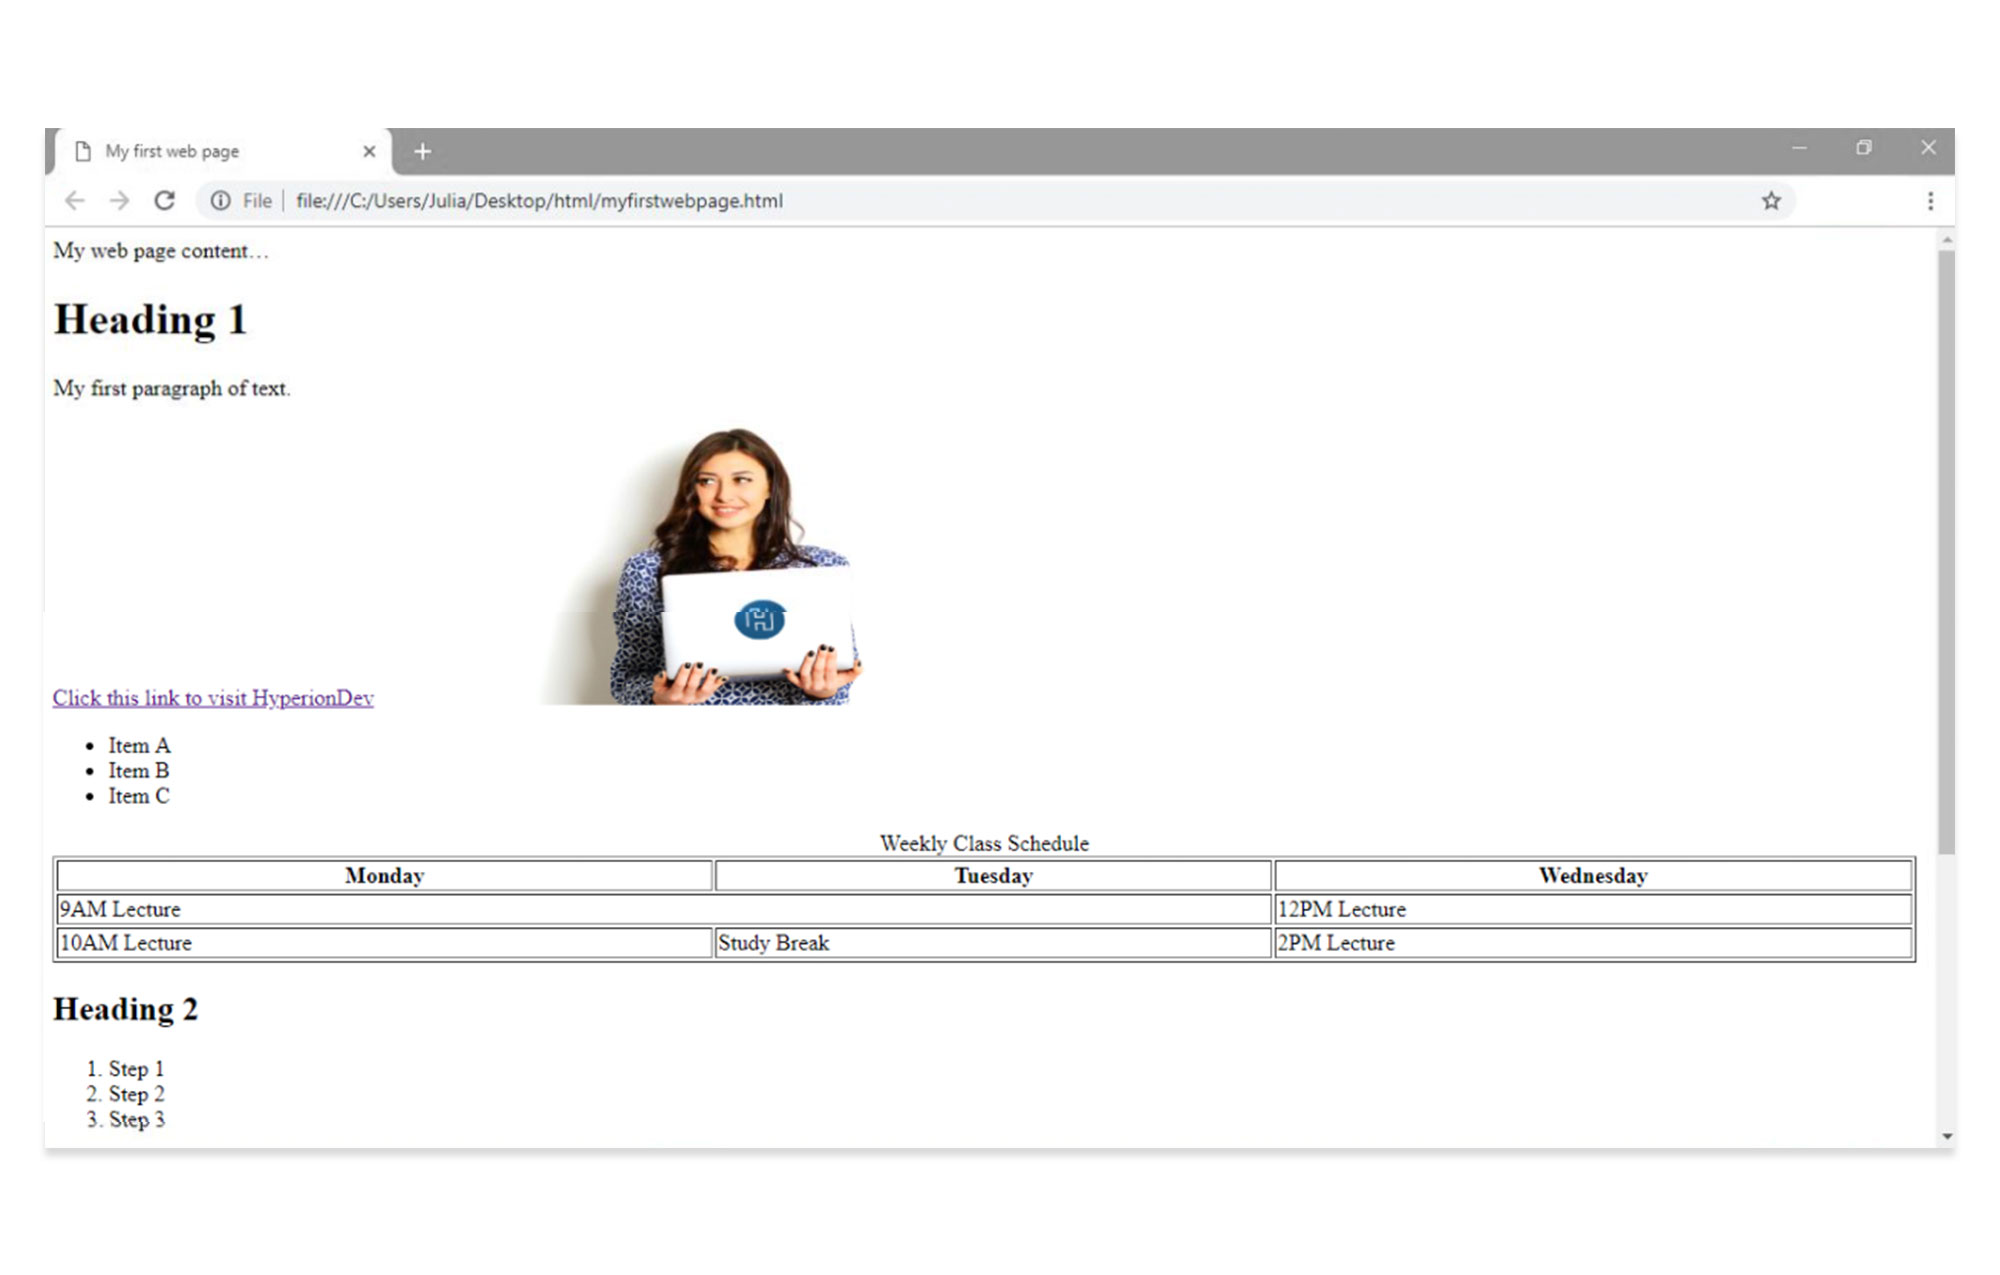
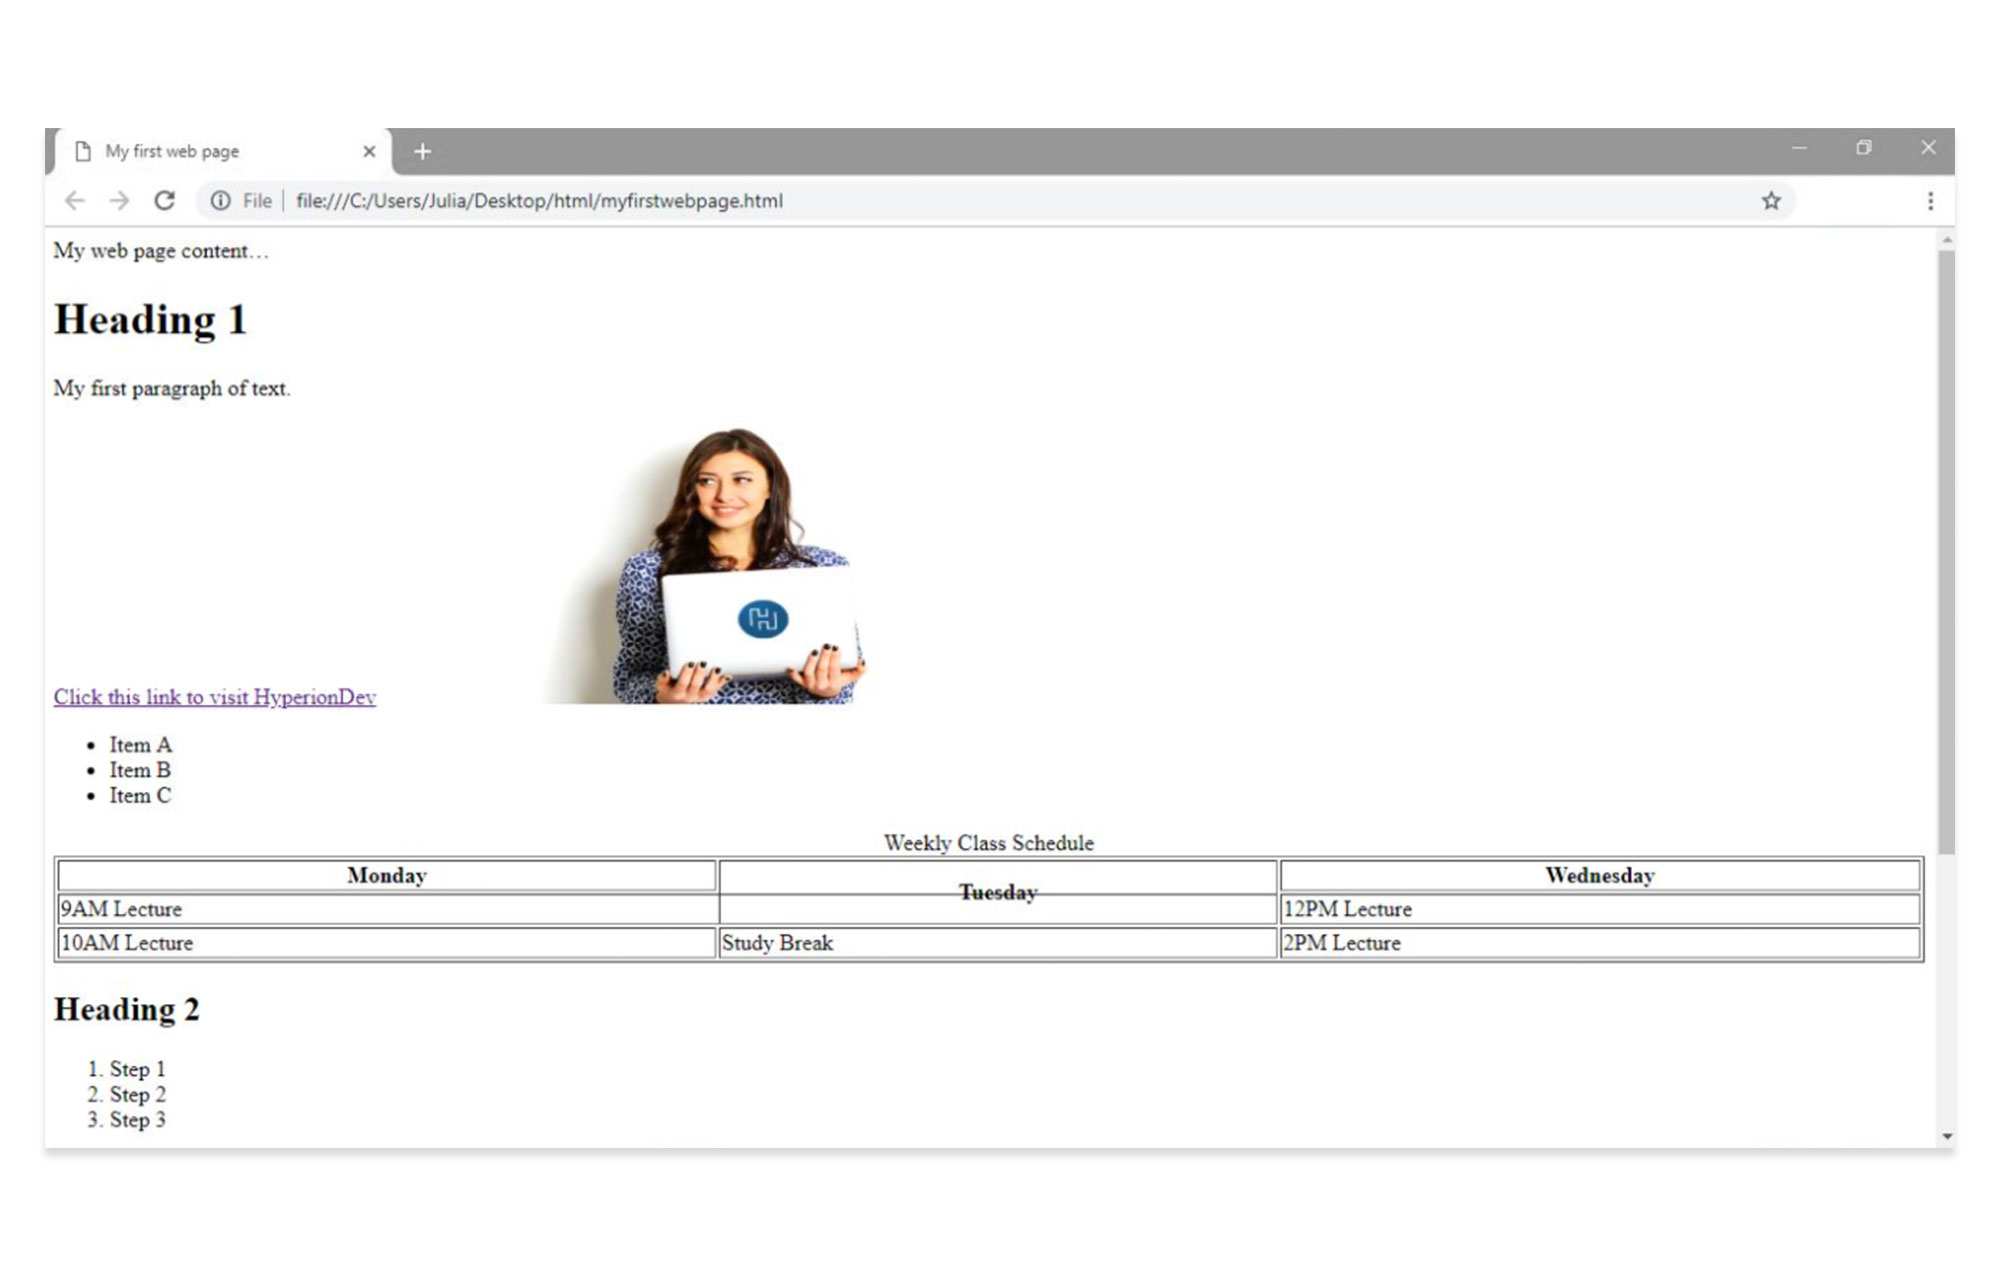
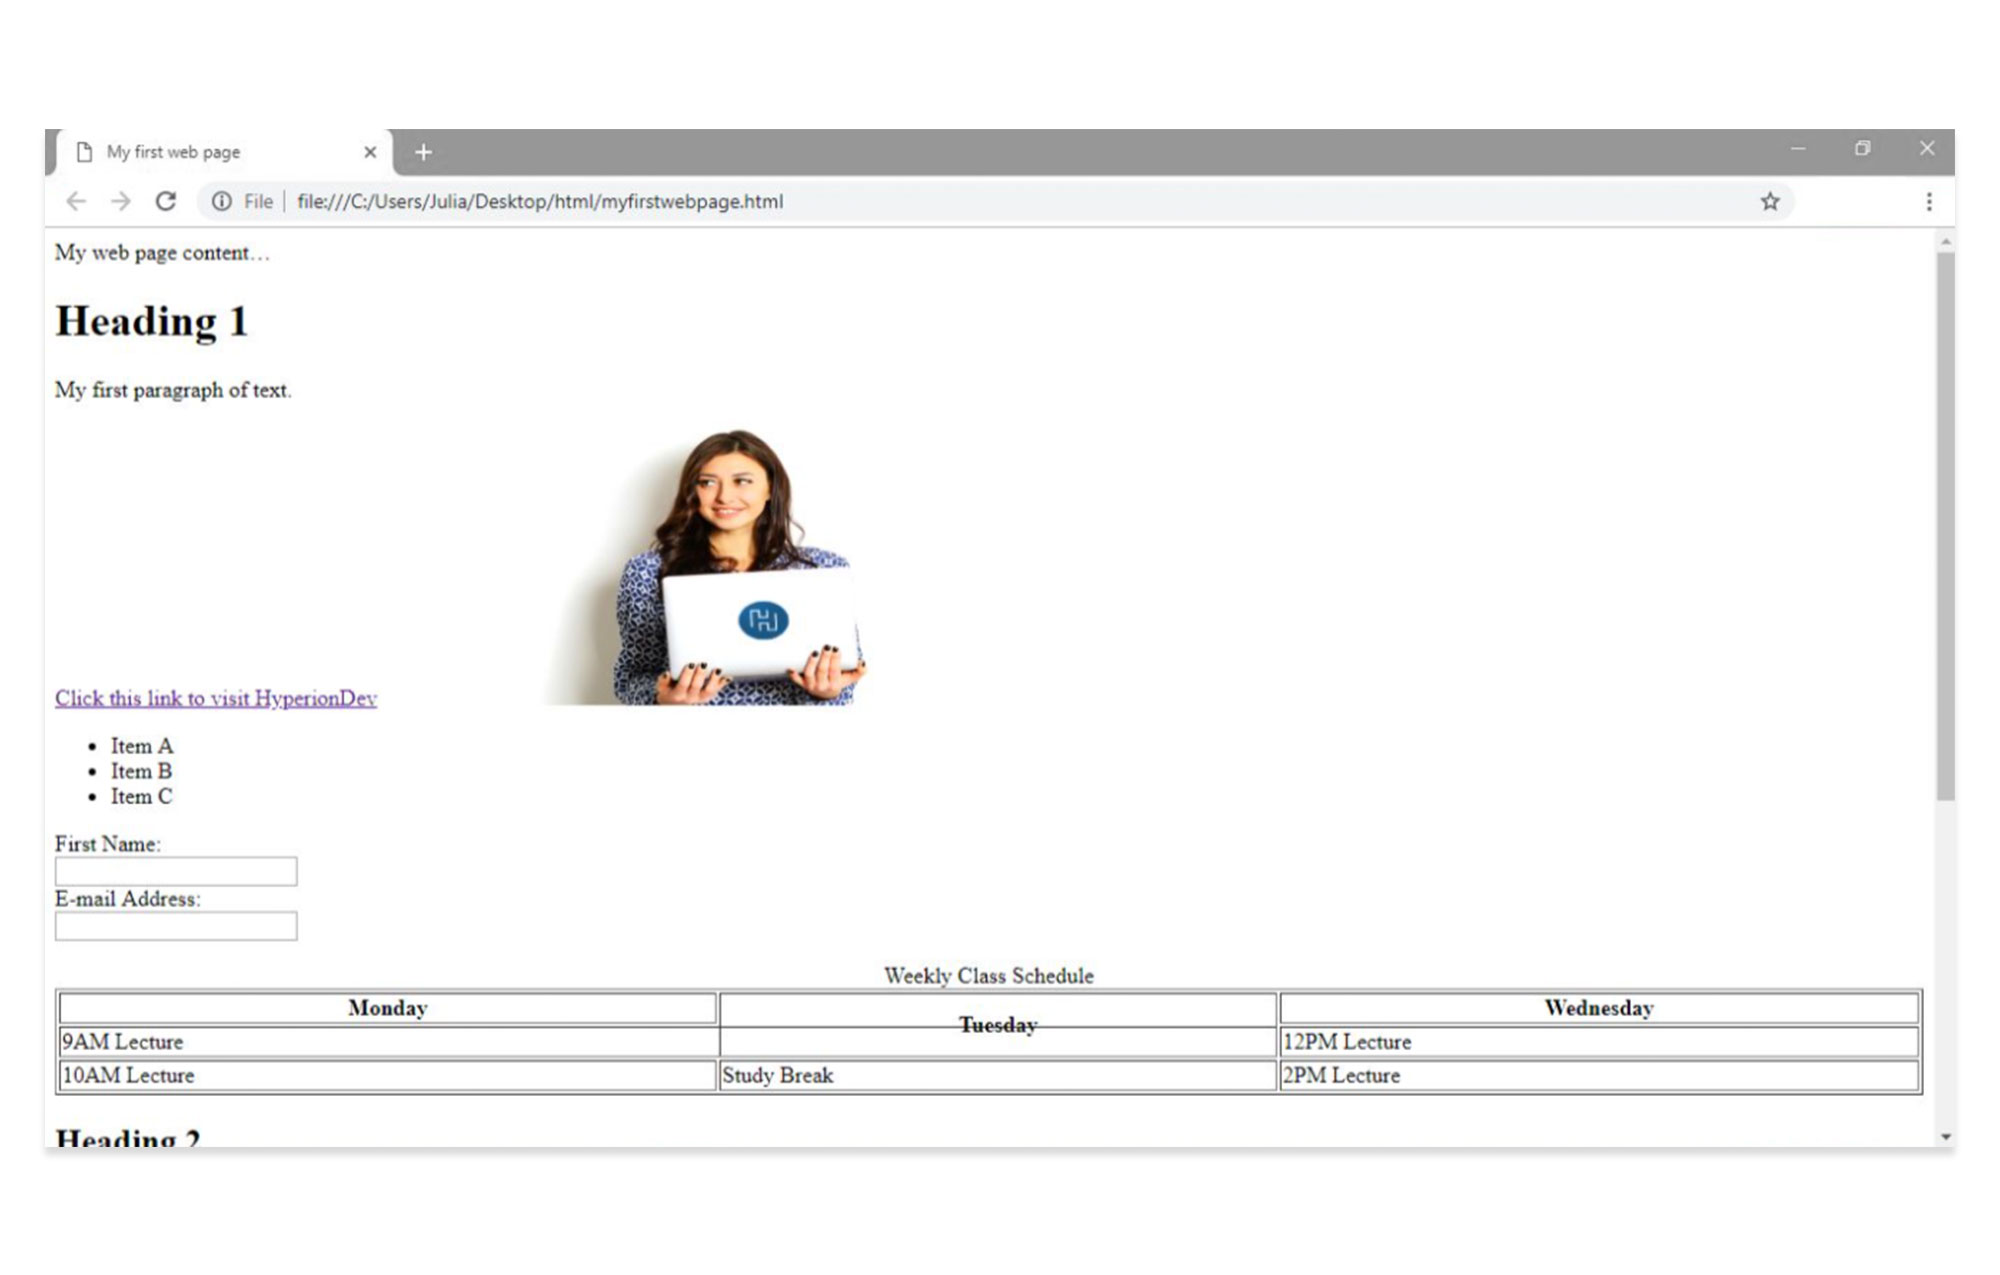
Captions: You can also add a caption to your table to tell the user what the content is about, using the <caption> tag. (For example, “Class Schedule” or “Client Details”.) This tag sits between the <table> tag and the first <tr> tag.
Add the caption “Weekly Class Schedule” to your table by adding the following code:
<table style="width:100%" border="1">
 <caption>Weekly Class Schedule</caption>
 <tr>
   <th>Monday</th>
   <th>Tuesday</th>
   <th>Wednesday</th>
 </tr>
 <tr>
   <td>9AM Lecture</td>
   <td>12PM Lecture</td>
   <td>Study Break</td>
 </tr>
  <tr>
   <td>10AM Lecture</td>
   <td>Study Break</td>
   <td>2PM Lecture</td>
  </tr>
</table>
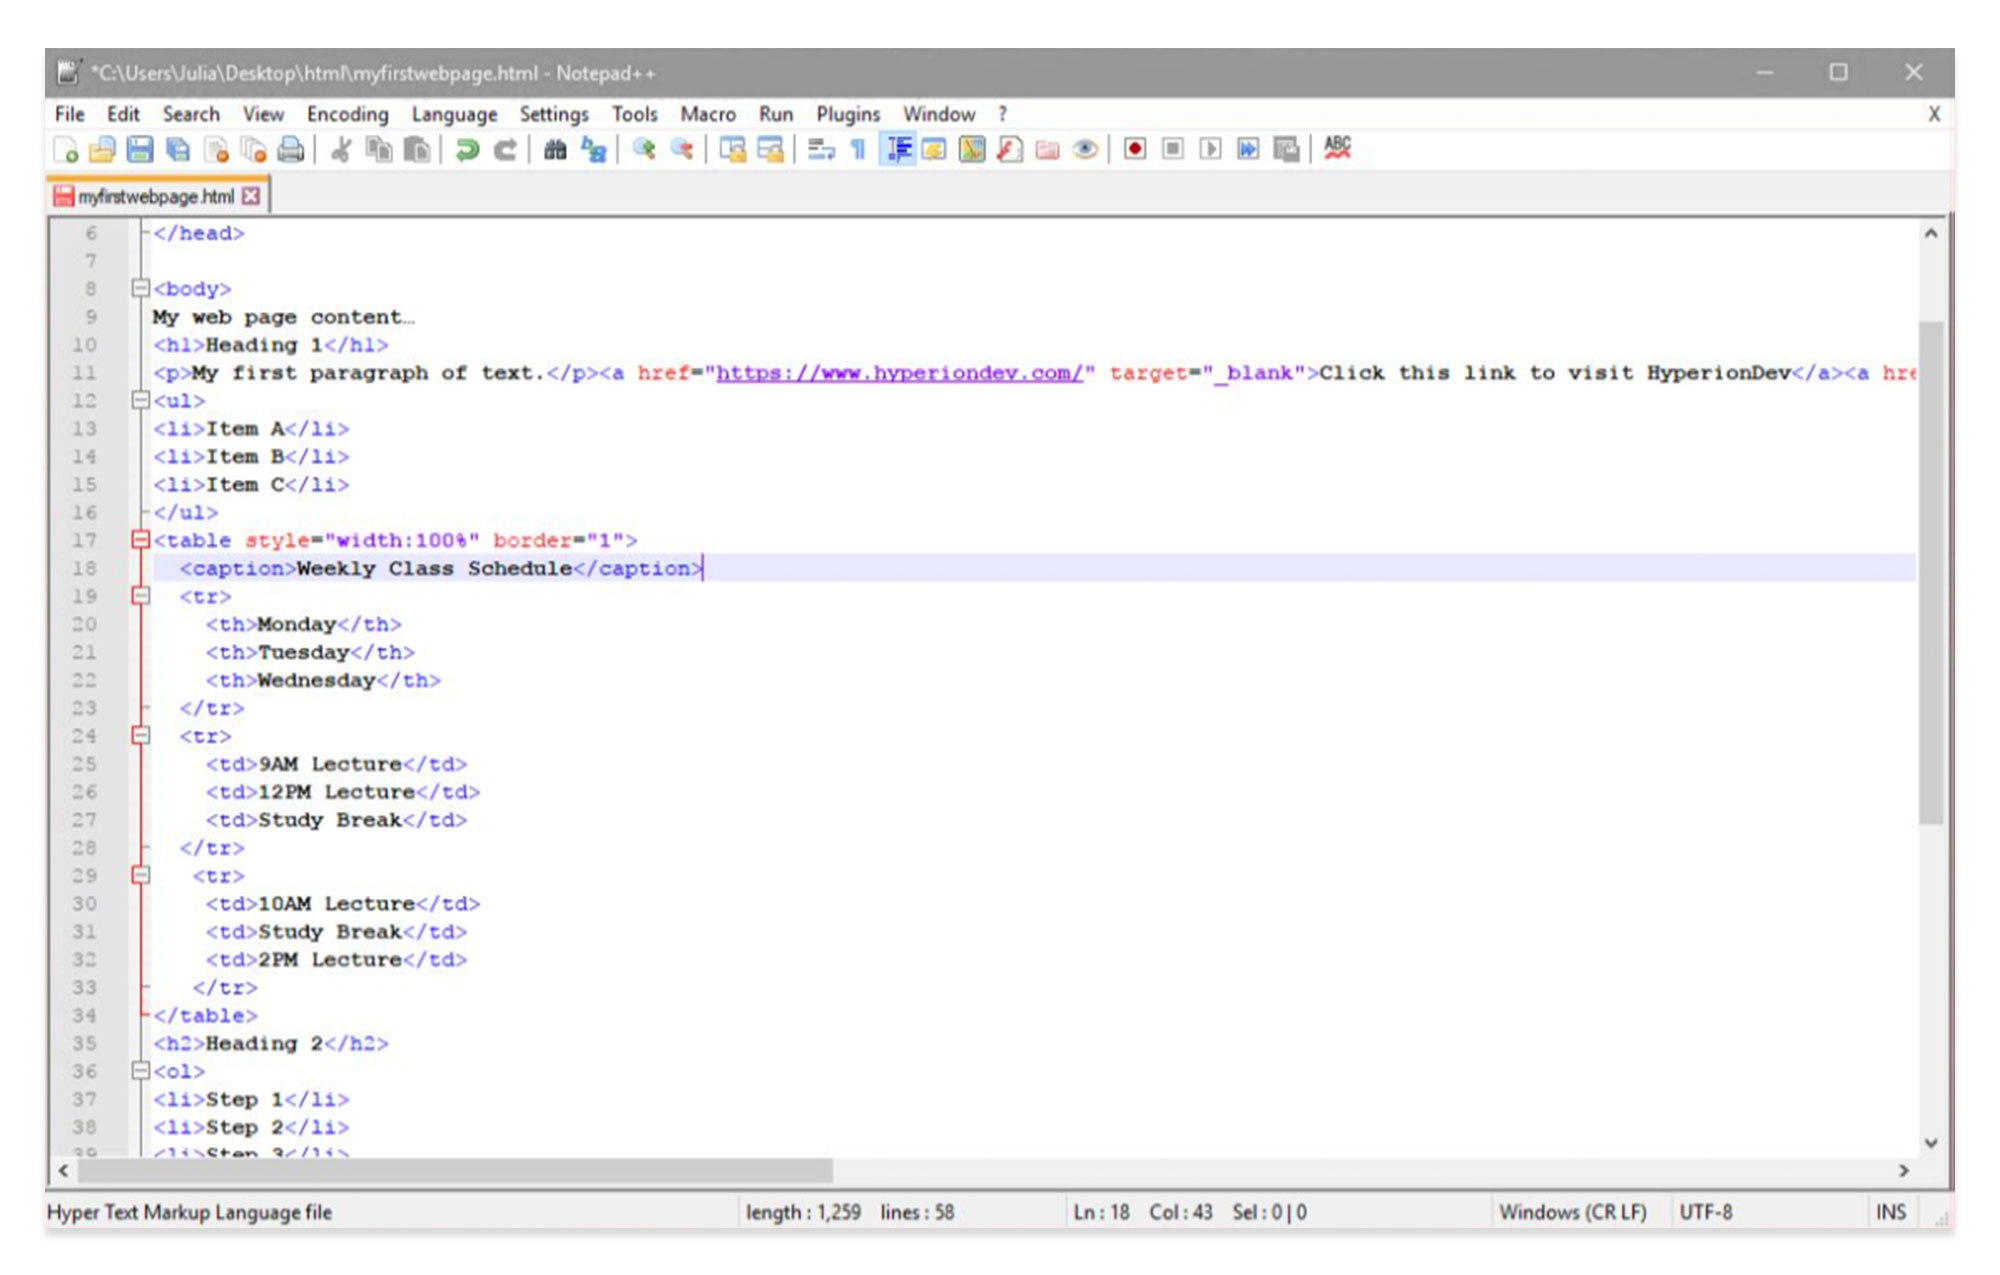
When you refresh the page, you’ll see that your caption appears above the table headings:
You can use HTML code to create tables with cells that span multiple columns, or multiple rows.
Multiple columns: To make a cell span more than one column, we must use the colspan attribute. (Remember, attributes are what we use to provide additional information about a specific HTML element.)
The number of columns must appear between quotation marks, ie. “2”.
For example, let’s say we want to adjust this class schedule, to show that the same 9AM lecture takes place both on Monday and on Tuesday. Edit the table by adding the colspan attribute to the “9AM Lecture” cell, and removing the ”Study Break” cell.
<table style="width:100%" border="1">
 <caption>Weekly Class Schedule</caption>
 <tr>
   <th>Monday</th>
   <th>Tuesday</th>
   <th>Wednesday</th>
 </tr>
 <tr>
   <td colspan="2">9AM Lecture</td>
   <td>12PM Lecture</td>
 </tr>
  <tr>
   <td>10AM Lecture</td>
   <td>Study Break</td>
   <td>2PM Lecture</td>
  </tr>
</table>
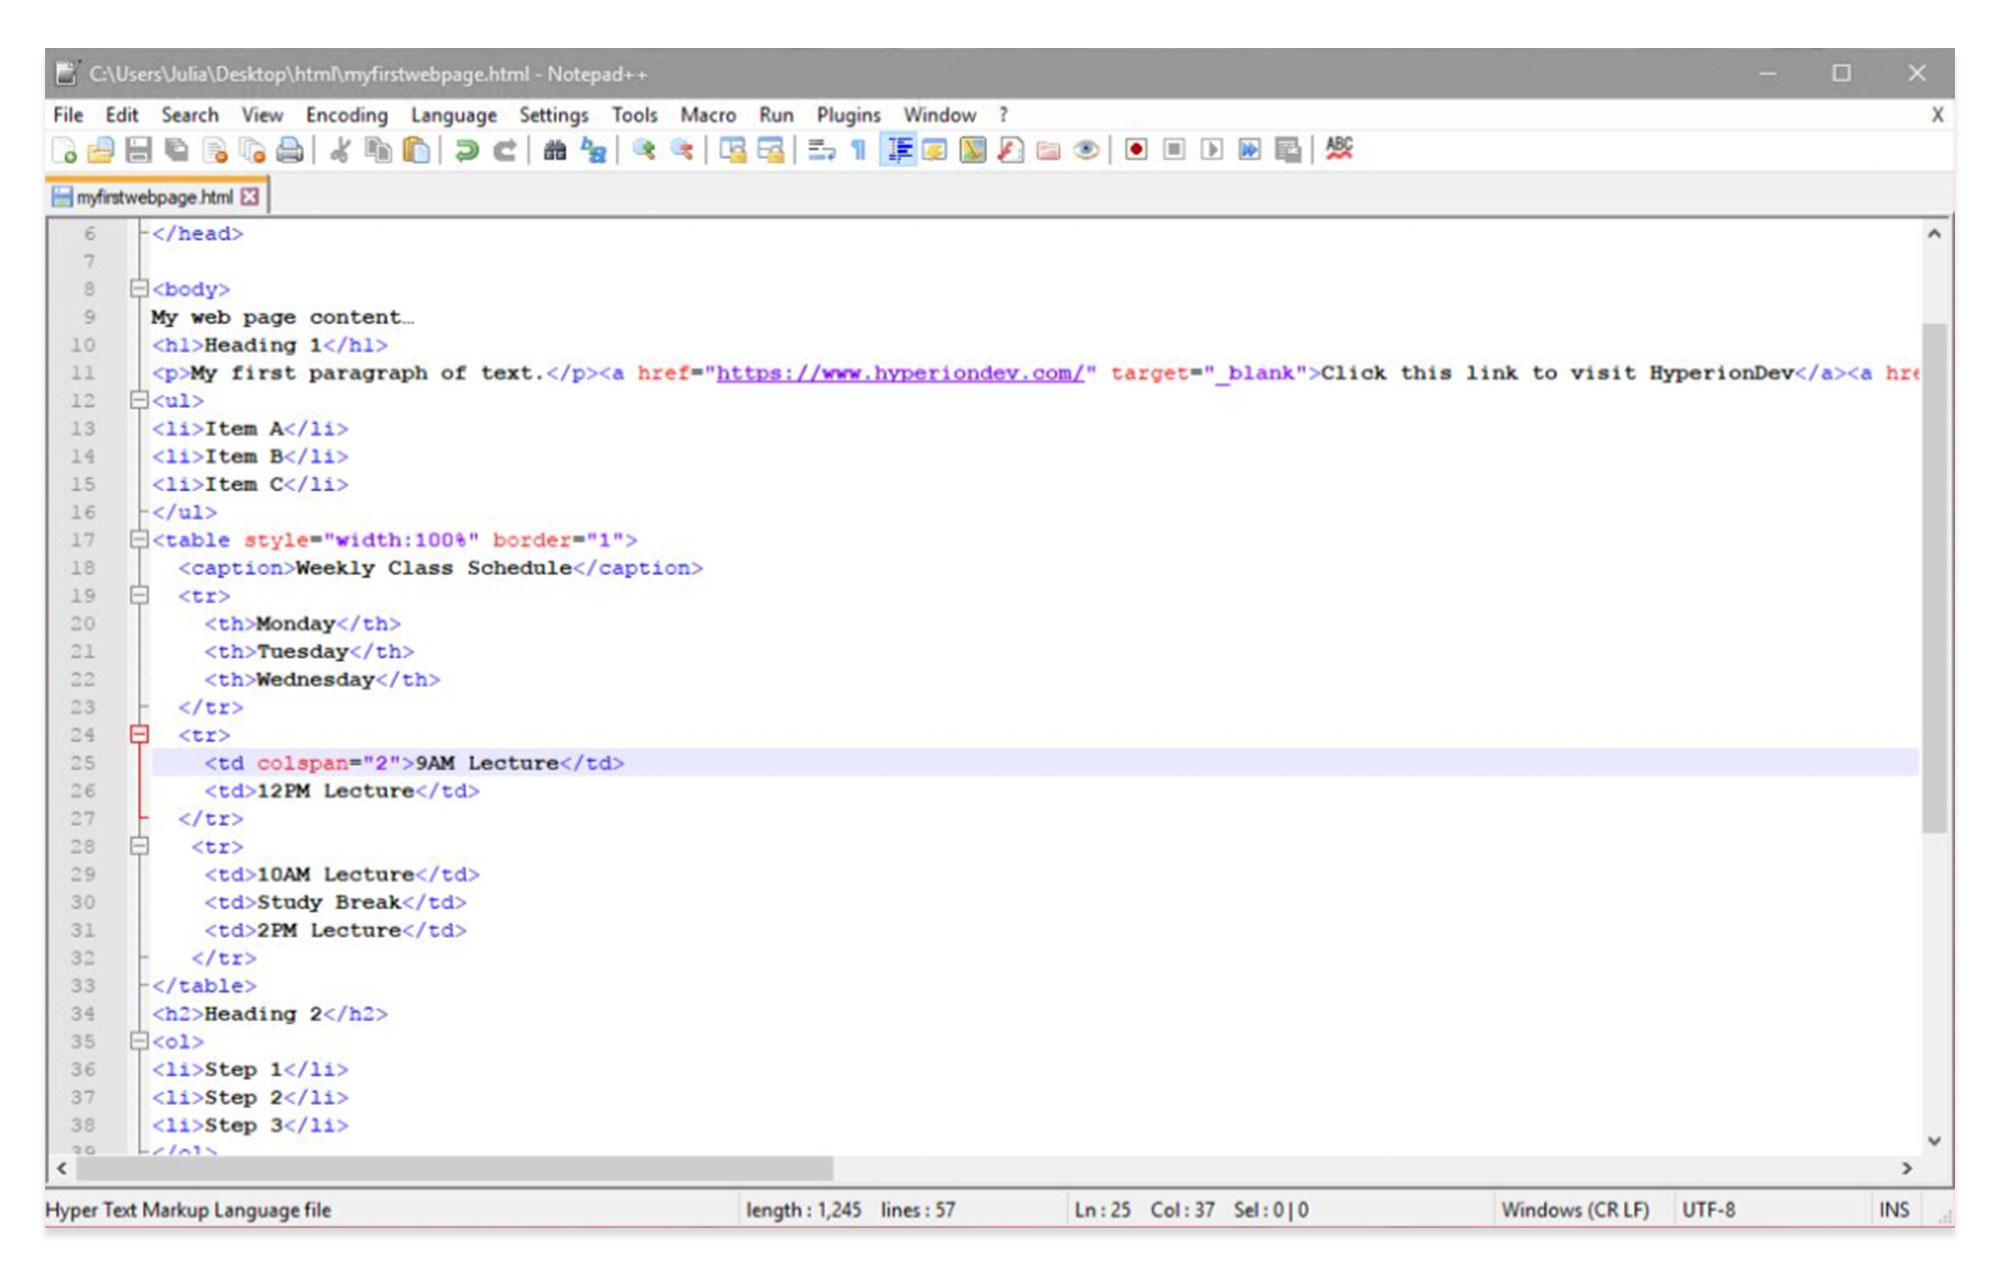
When you refresh, the appearance of the table will have changed, with the “9AM Lecture” cell spanning the Monday and Tuesday columns.
Multiple rows: To make a cell span more than one row, use the rowspan attribute. Again, the number of rows must appear between quotation marks. This is useful in cases where you have two rows that fall under one heading.
To change the “Tuesday” heading so that it spans two rows, edit the table by adding a rowspan attribute.
<table style="width:100%" border="1">
 <caption>Weekly Class Schedule</caption>
 <tr>
   <th>Monday</th>
   <th rowspan="2">Tuesday</th>
   <th>Wednesday</th>
 </tr>
 <tr>
   <td colspan="2">9AM Lecture</td>
   <td>12PM Lecture</td>
 </tr>
  <tr>
   <td>10AM Lecture</td>
   <td>Study Break</td>
   <td>2PM Lecture</td>
  </tr>
</table>
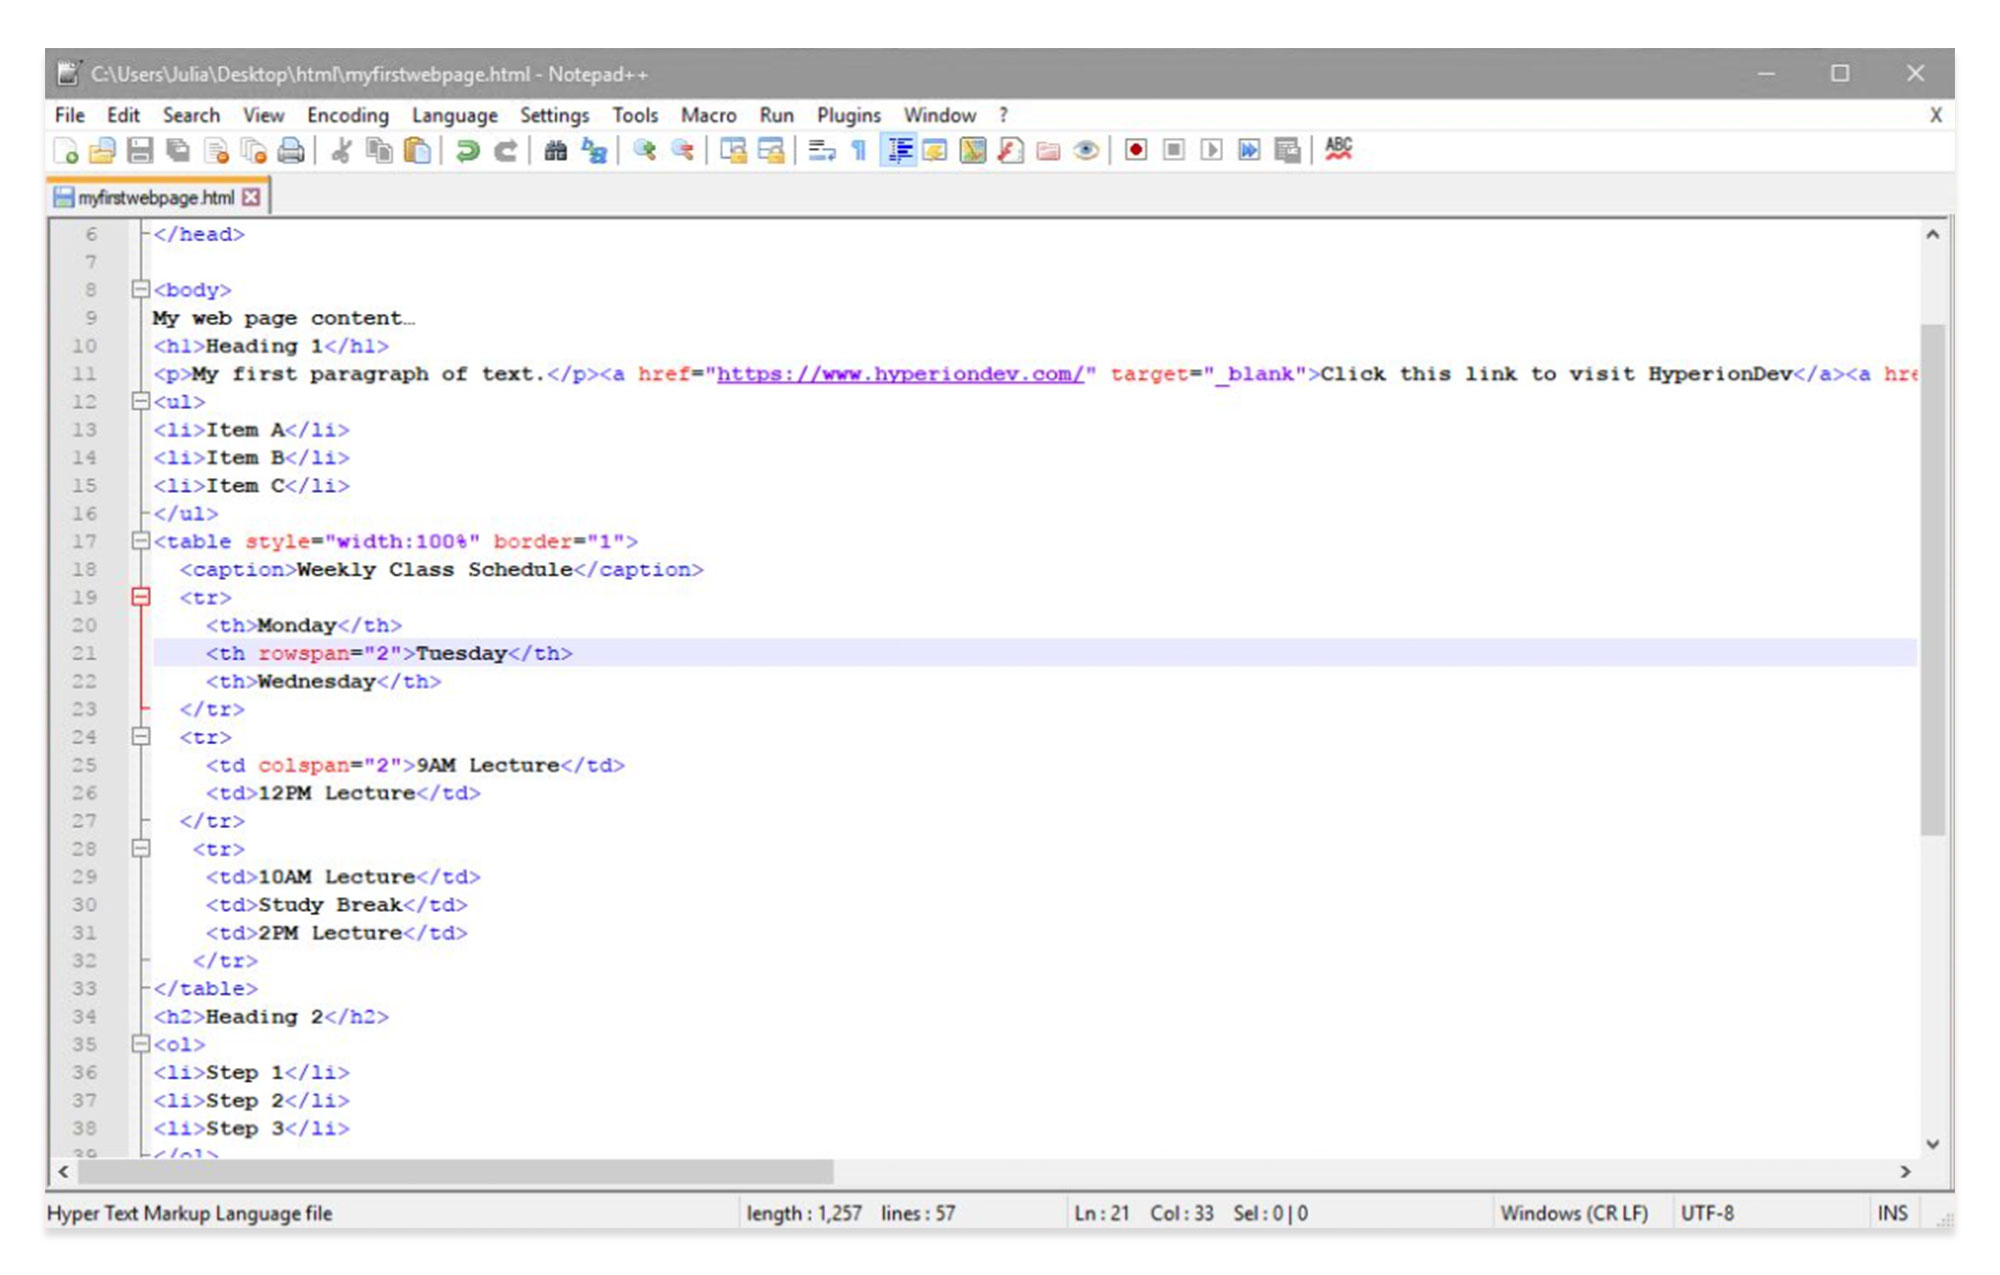
When you refresh, the ”Tuesday” cell will span over two rows.
HTML forms
A form allows users on the site to enter information. You will need to use the <form> tag to define a form that will be used to collect user input.
An HTML form contains form elements, which are various types of input elements, including text fields, check boxes, radio buttons and submit buttons.
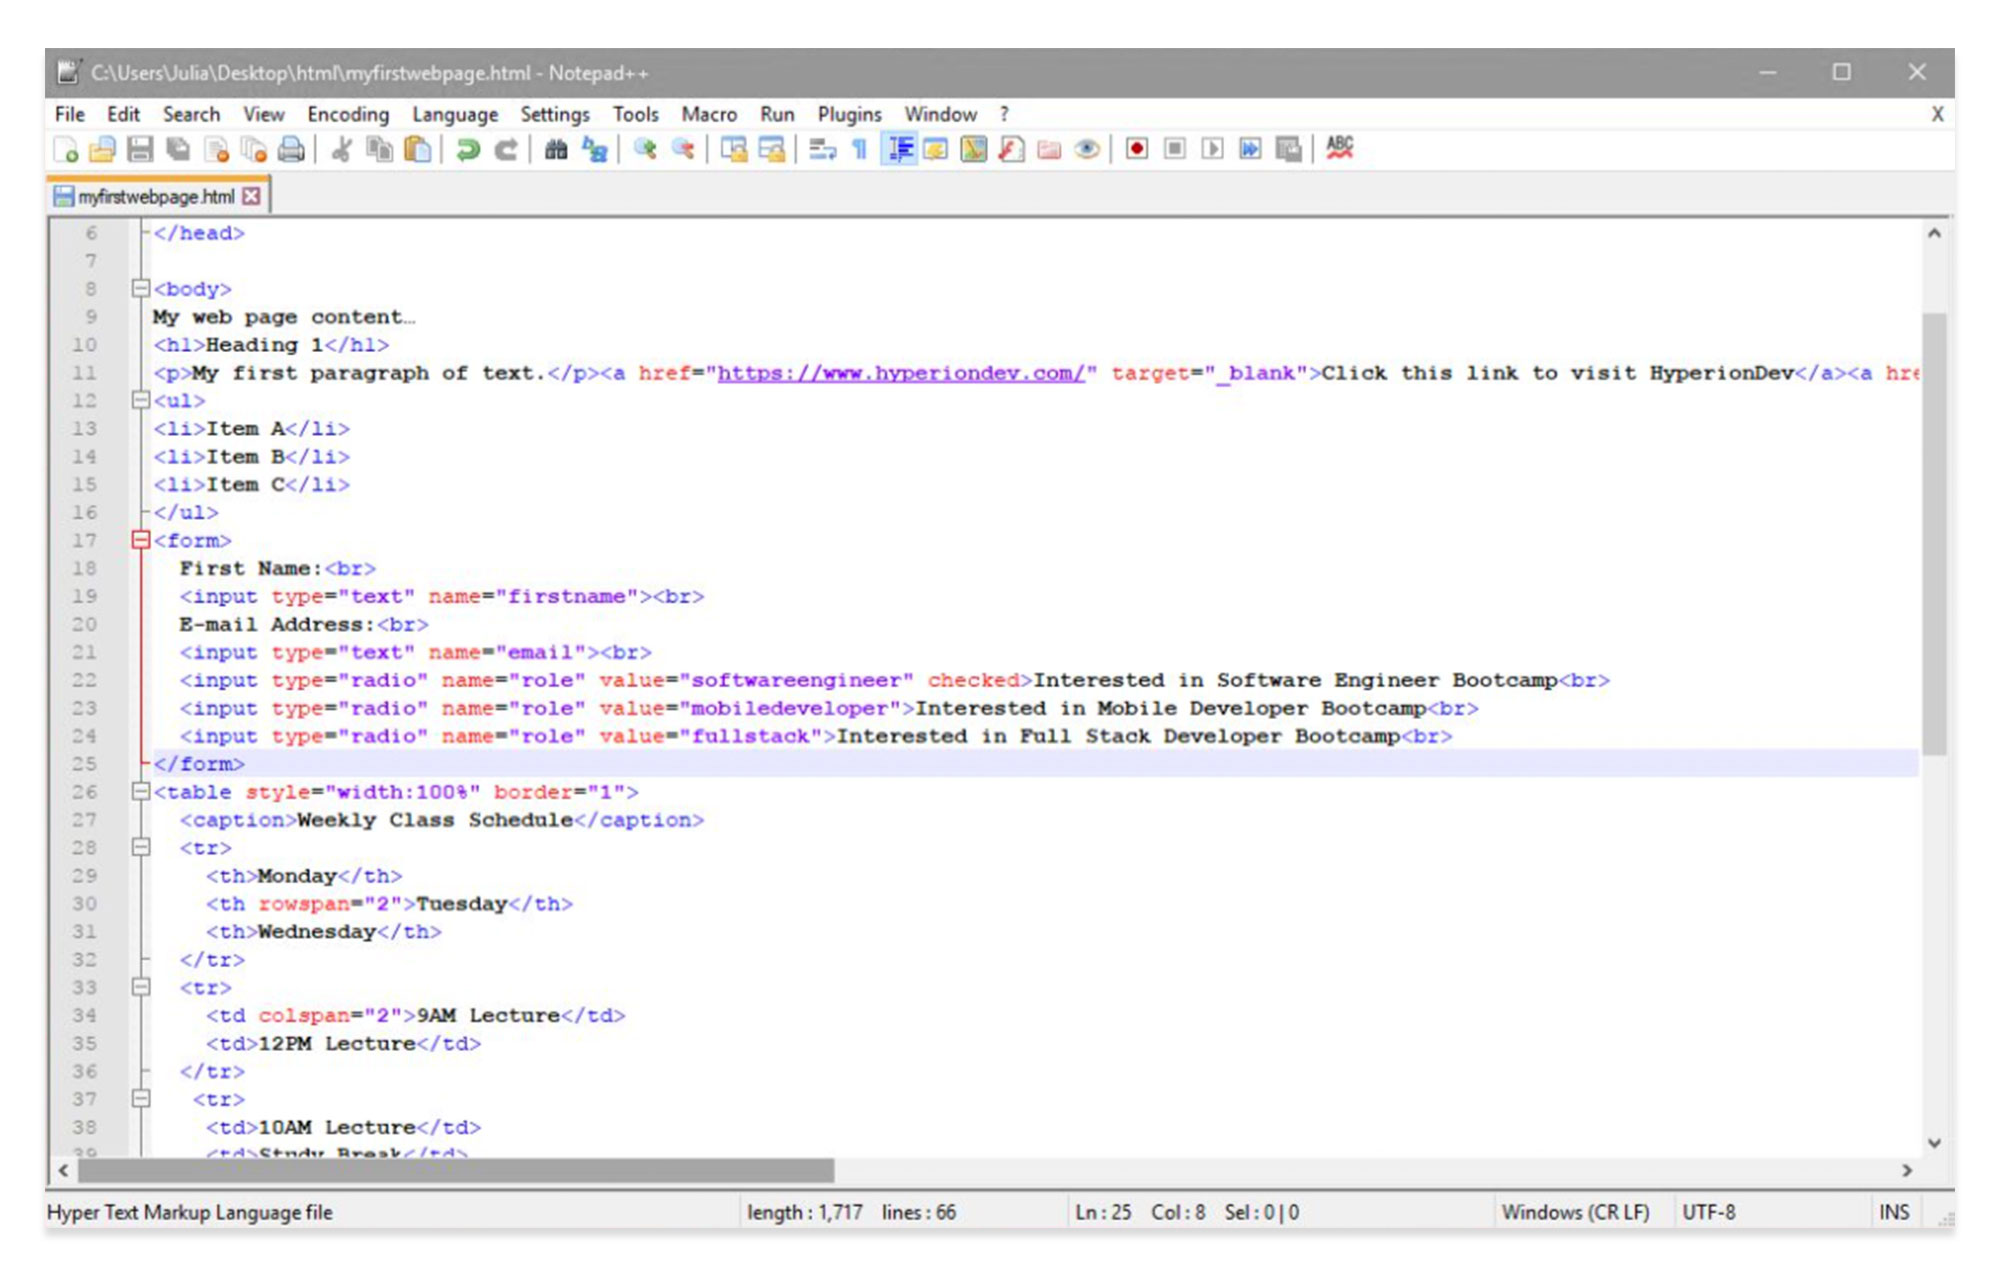
Add your opening and closing tags for your form, above the table:
<form>
.
.
</form>
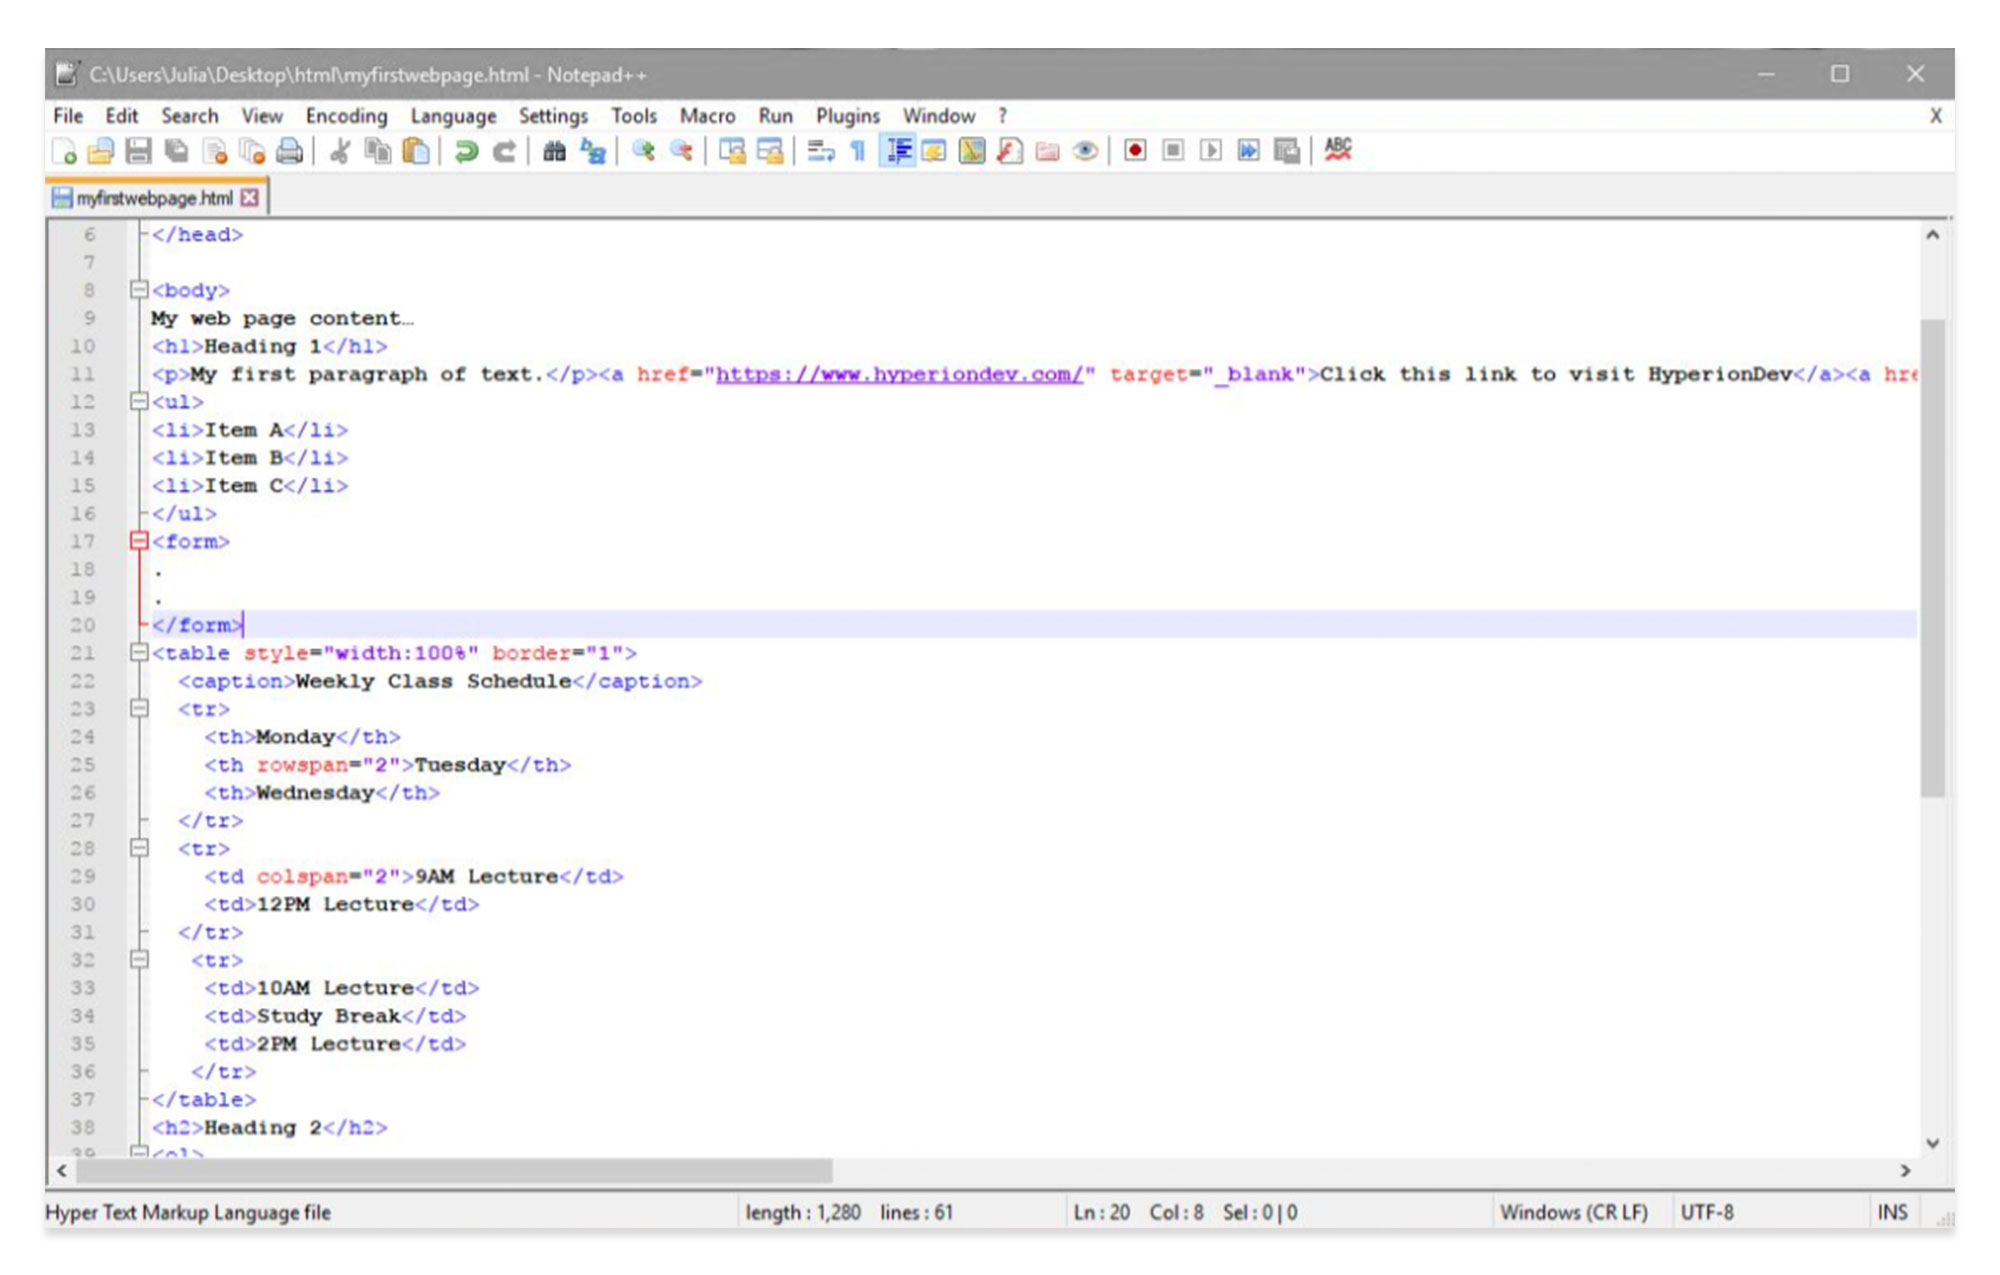
You will now have space for the form on your refreshed page:
The <input> element is the most important of all the form elements. It can be displayed in a number of ways, depending on the type attribute used.
For example:
<input type=”text”> defines a one-line text input field.
<input type=”radio”> defines a radio button.
<input type=”submit”> defines a submit button.
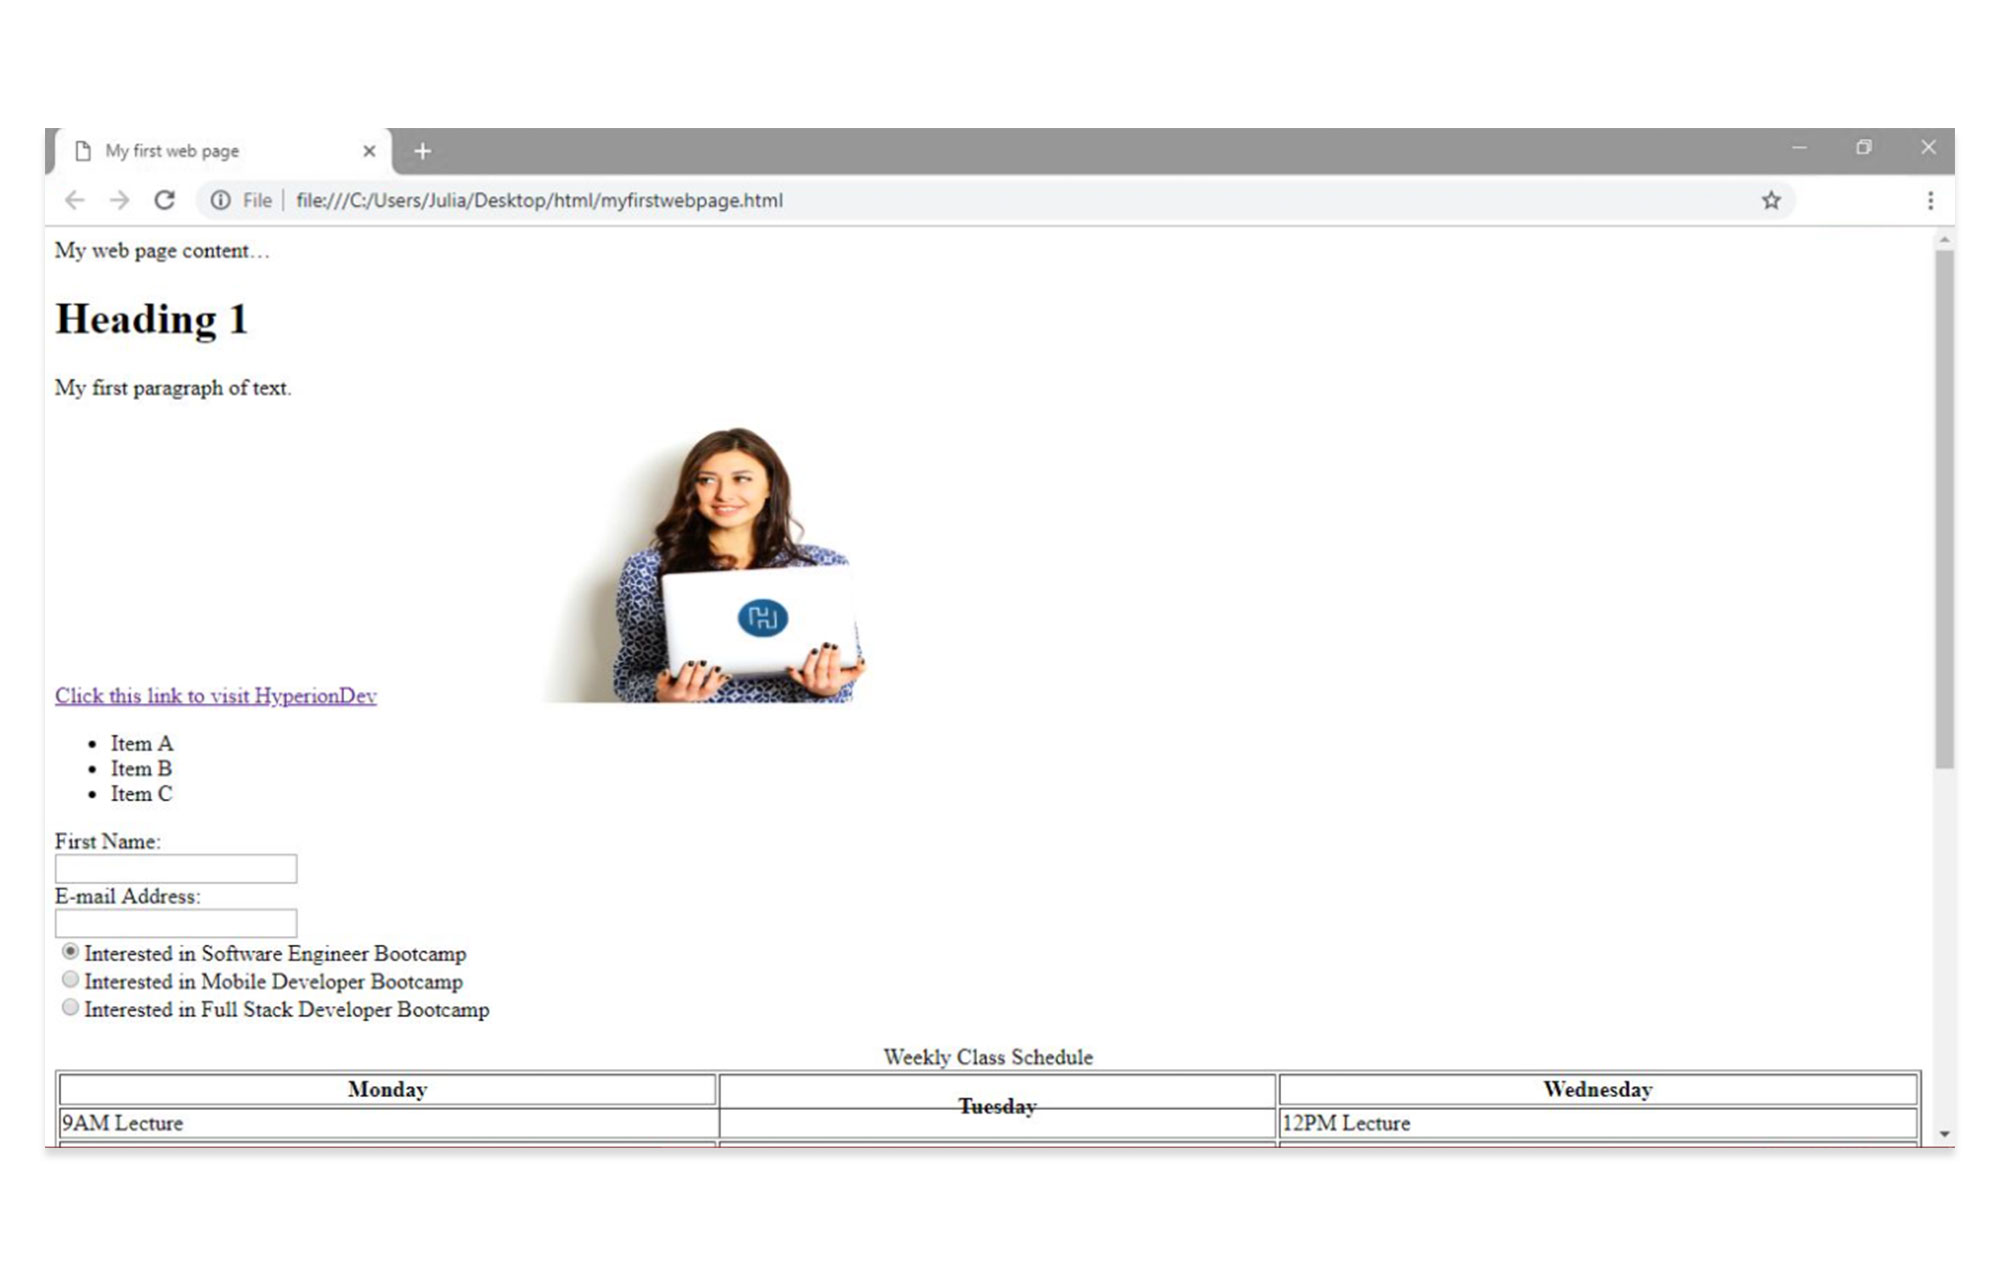
Text fields: Add attributes into your form as follows, asking the user to input their name and e-mail address. The <br> tag adds a break, which allows you to display text on a new line. The input type and name must appear inside quotation marks.
<form>
 First Name:<br>
 <input type="text" name="firstname"><br>
 E-mail Address:<br>
 <input type="text" name="email">
</form>
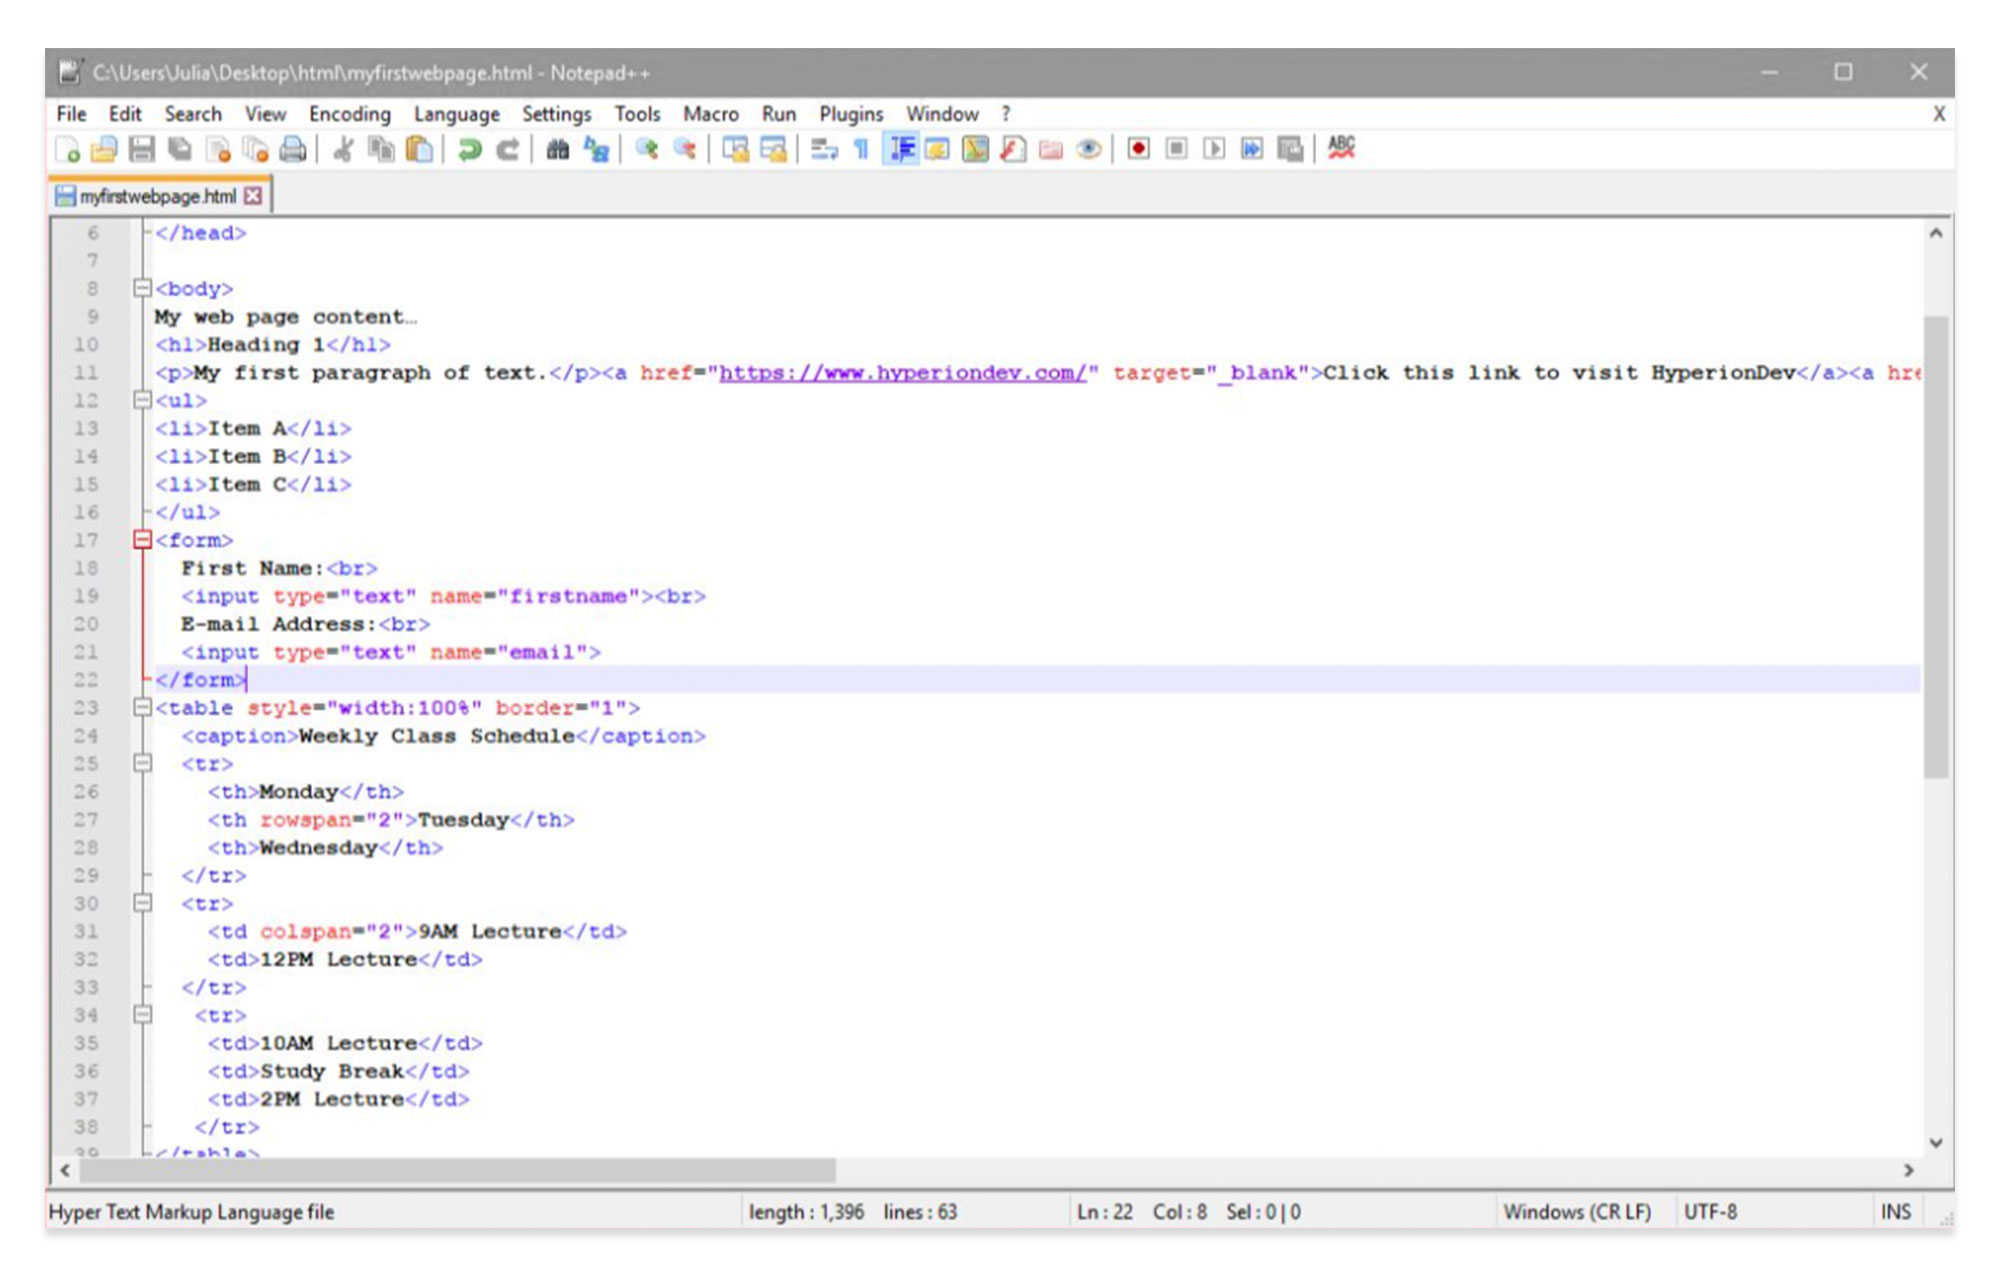
Now the input fields will appear in the form on your page.
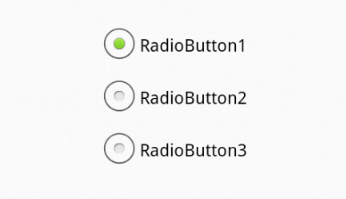
Radio buttons: A radio button is a graphical icon representing one of a set of options. A user can only select one option at a time.
You will also need to use a value attribute, which specifies the value of an <input> element. Again, input types and names must appear inside quotation marks.
Add three radio button options to your form, using this code:
<form>
 First Name:<br>
 <input type="text" name="firstname"><br>
 E-mail Address:<br>
 <input type="text" name="email"><br>
 <input type="radio" name="role" value="softwareengineer" checked>Interested in Software Engineer Bootcamp<br>
 <input type="radio" name="role" value="mobiledeveloper">Interested in Mobile Developer Bootcamp<br>
 <input type="radio" name="role" value="fullstack">Interested in Full Stack Developer Bootcamp<br>
</form>
The updated page will display a choice of three clickable radio buttons.
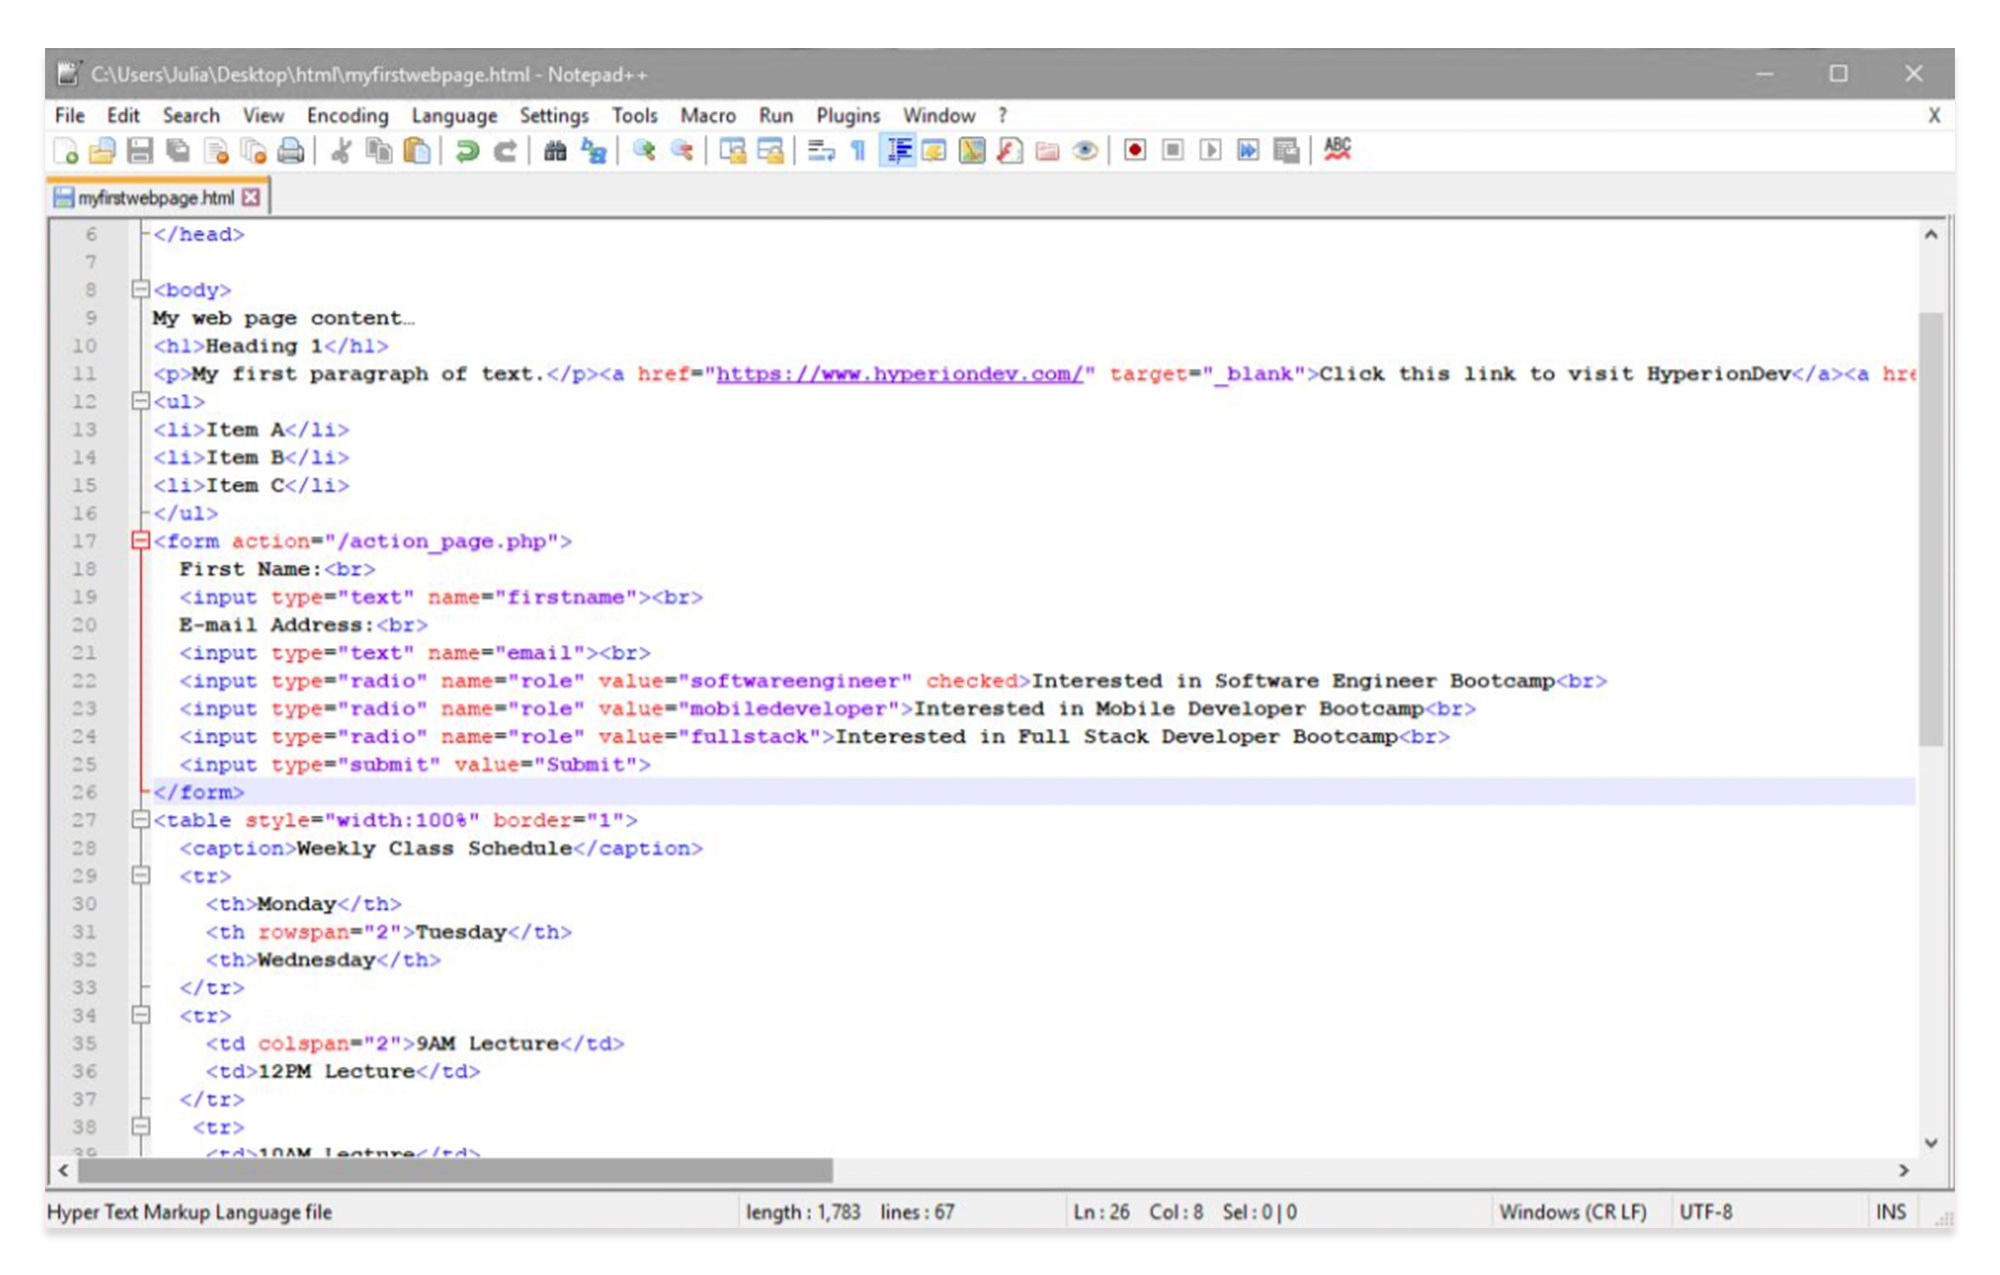
Submit button: This button allows the user to submit the form data to a form-handler; a server page that processes the data.
The form-handler is typically a server page with a script for processing input data.
The form-handler is specified using the action attribute. This attribute defines the action that will be performed when the form is submitted. In this case, “/action_page.php” would contain a server-side script to handle the form data.
Add a submit button and action attribute to your form as follows:
<form action="/action_page.php">
 First Name:<br>
 <input type="text" name="firstname"><br>
 E-mail Address:<br>
 <input type="text" name="email"><br>
 <input type="radio" name="role" value="softwareengineer" checked>Interested in Software Engineer Bootcamp<br>
 <input type="radio" name="role" value="mobiledeveloper">Interested in Mobile Developer Bootcamp<br>
 <input type="radio" name="role" value="fullstack">Interested in Full Stack Developer Bootcamp<br>
 <input type="submit" value="Submit">
</form>
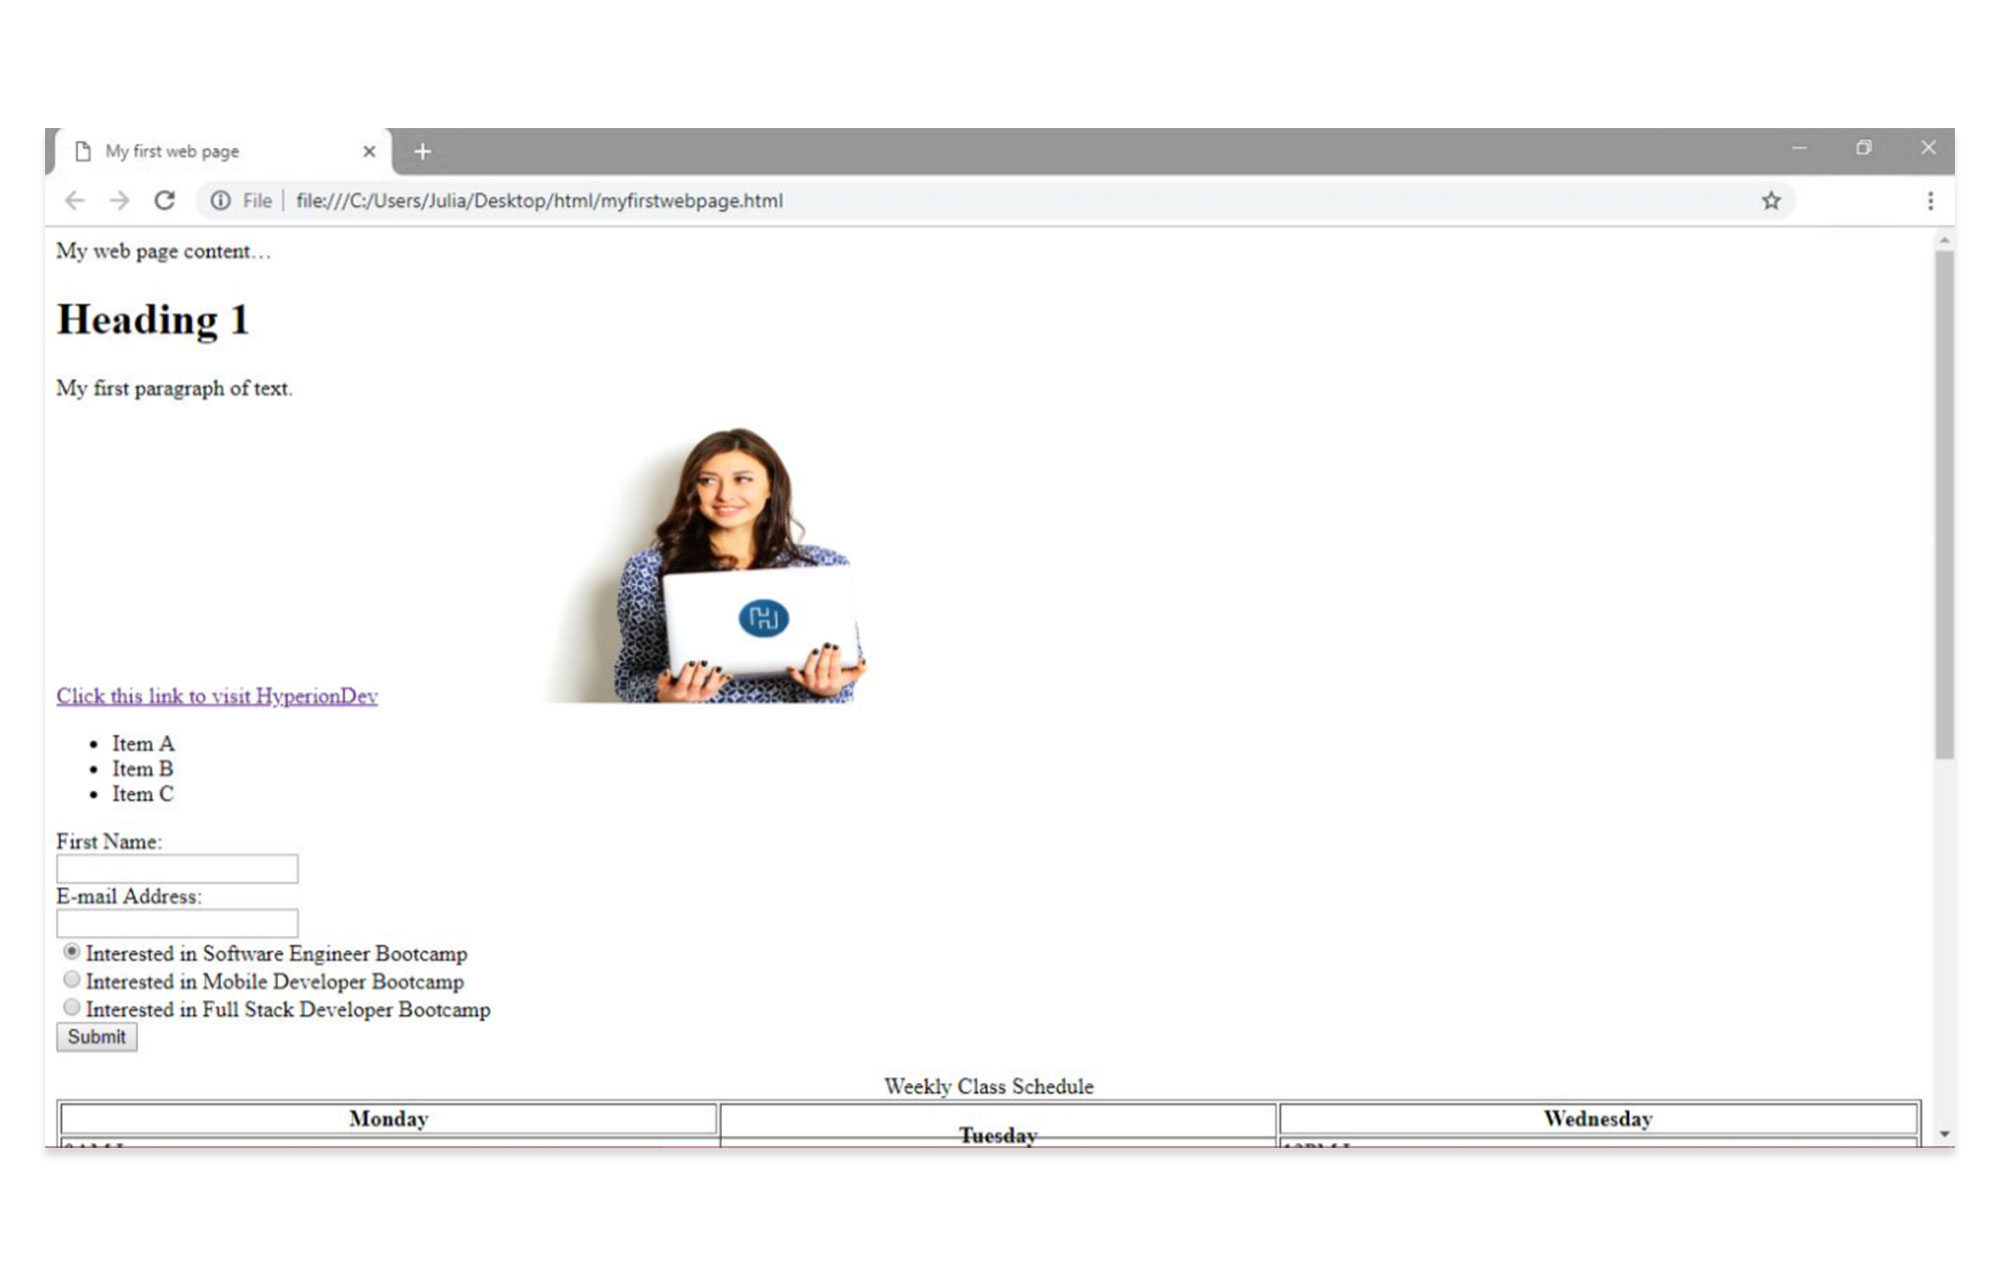
The submit button will appear in the browser.
Now that you’ve covered the basics of tables and forms, you can try your hand at some more complex layouts.
If you want to learn about the finer details of HTML coding, it’s time to go a little further than an HTML tutorial for beginners. Dive into an online coding bootcamp, complete with mentorship and code review.
